About The Project
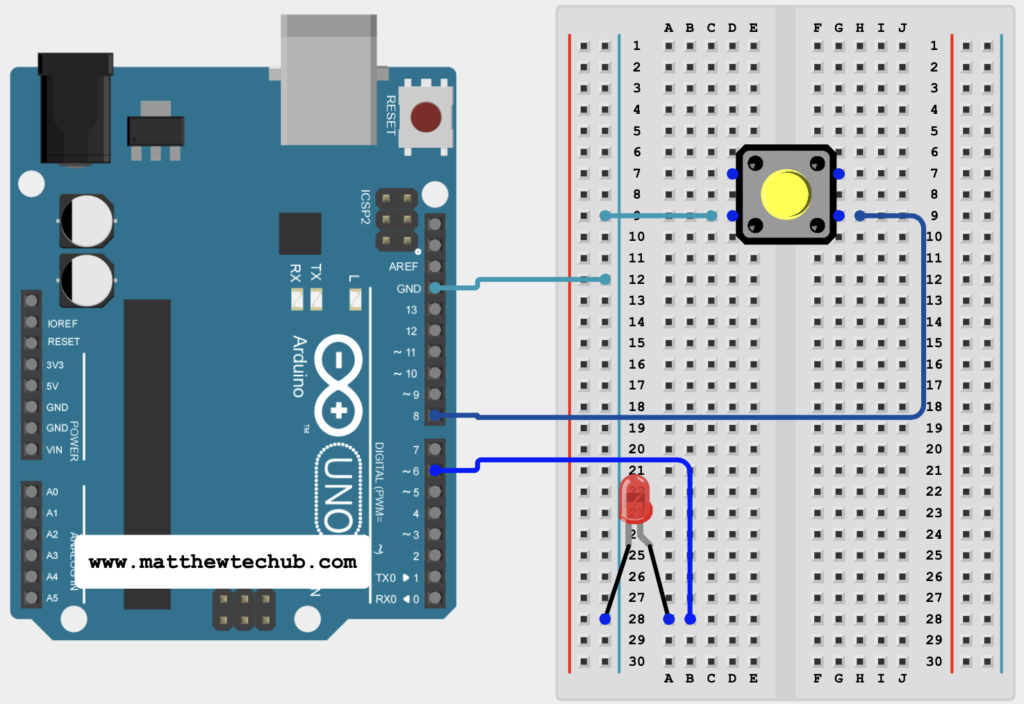
- In this project, we will learn how to interface an Arduino Uno board with a button switch and an LED.
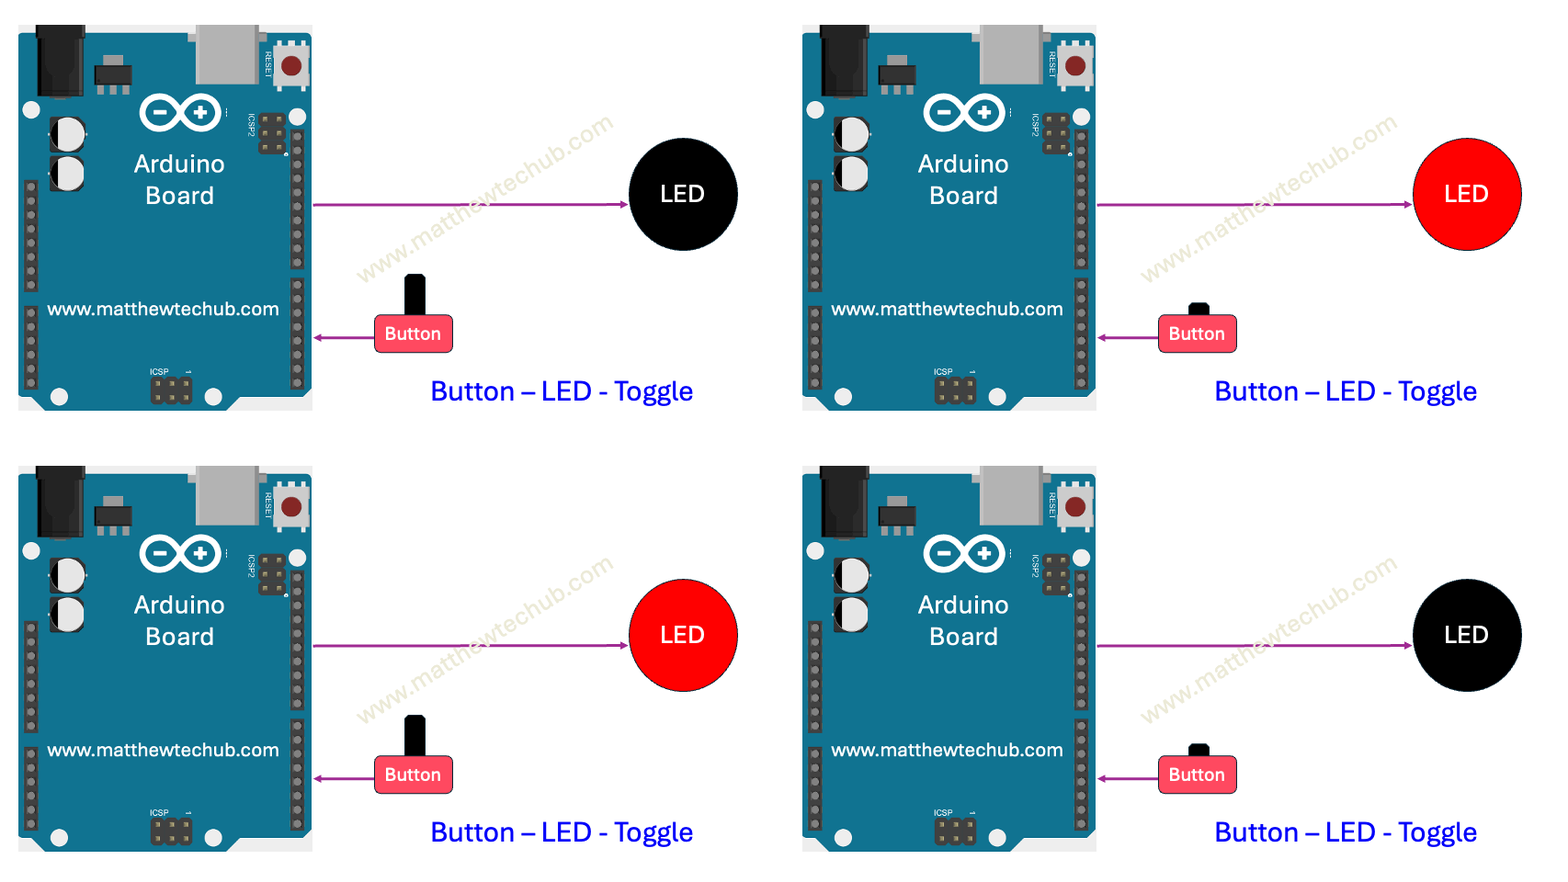
- The LED will toggle each time the button is pressed.
Circuit Wiring

Program Code
// toggle led with a button switch

// www.matthewtechub.com

const int ledPin = 6;

// Pin where the LED is connected

const int buttonPin = 8;

// Pin where the button is connected

int ledState = LOW;

// Initial state of the LED

int buttonState;

// Variable to store the current button state

int lastButtonState = HIGH;

// Variable to store the last button state

void setup() {

    pinMode(ledPin, OUTPUT);

    // Set the LED pin as an output

    pinMode(buttonPin, INPUT_PULLUP);

    // Set the button pin as an input with internal pull-up resistor

}

void loop() {

    buttonState = digitalRead(buttonPin);

    // Read the state of the button

    // Check if the button state has changed

    if (buttonState != lastButtonState) {

        // If the button is pressed (LOW state)

        if (buttonState == LOW) {

            ledState = !ledState;

            // Toggle the LED state

            digitalWrite(ledPin, ledState);

            // Update the LED state

        }

        // Short delay to debounce (optional, for basic noise reduction)

        delay(50);

    }

    lastButtonState = buttonState;

    // Update the last button state

}Code Explanation
const int ledPin = 6;
// Pin where the LED is connected
const int buttonPin = 8;
// Pin where the button is connected
int ledState = LOW;
// Initial state of the LED
int buttonState;
// Variable to store the current button state
int lastButtonState = HIGH;
// Variable to store the last button state
- ledPin = 6: Pin connected to the LED.
- buttonPin = 8: Pin connected to the button.
- ledState = LOW: Initial state of the LED (off).
- buttonState: Stores the current state of the button.
- lastButtonState = HIGH: Stores the previous state of the button, initialized to HIGH since the pull-up resistor makes the default state HIGH (unpressed).
void setup() {
pinMode(ledPin, OUTPUT);
// Set the LED pin as an output
pinMode(buttonPin, INPUT_PULLUP);
// Set the button pin as an input with internal pull-up resistor
}
- pinMode(ledPin, OUTPUT): Configures the LED pin as an output.
- pinMode(buttonPin, INPUT_PULLUP): Configures the button pin as an input with an internal pull-up resistor, which keeps the pin HIGH when the button is not pressed.
void loop() {
buttonState = digitalRead(buttonPin);
// Read the state of the button
// Check if the button state has changed
if (buttonState != lastButtonState) {
// If the button is pressed (LOW state)
if (buttonState == LOW) {
ledState = !ledState;
// Toggle the LED state
digitalWrite(ledPin, ledState);
// Update the LED state
}
// Short delay to debounce (optional, for basic noise reduction)
delay(50);
}
lastButtonState = buttonState;
// Update the last button state
}
- buttonState = digitalRead(buttonPin): Reads the current state of the button.
- if (buttonState != lastButtonState): Checks if the button state has changed since the last loop iteration.
- if (buttonState == LOW): If the button is pressed (LOW state), it toggles the LED state (ledState = !ledState) and updates the LED accordingly (digitalWrite(ledPin, ledState)).
- delay(50): Adds a short delay to debounce the button, reducing noise and ensuring stable button state changes.
- lastButtonState = buttonState: Updates lastButtonState to the current button state for the next iteration.
Try Yourself
Modify the program to change the color of the RGB LED each time the button is pressed.
