About The Project
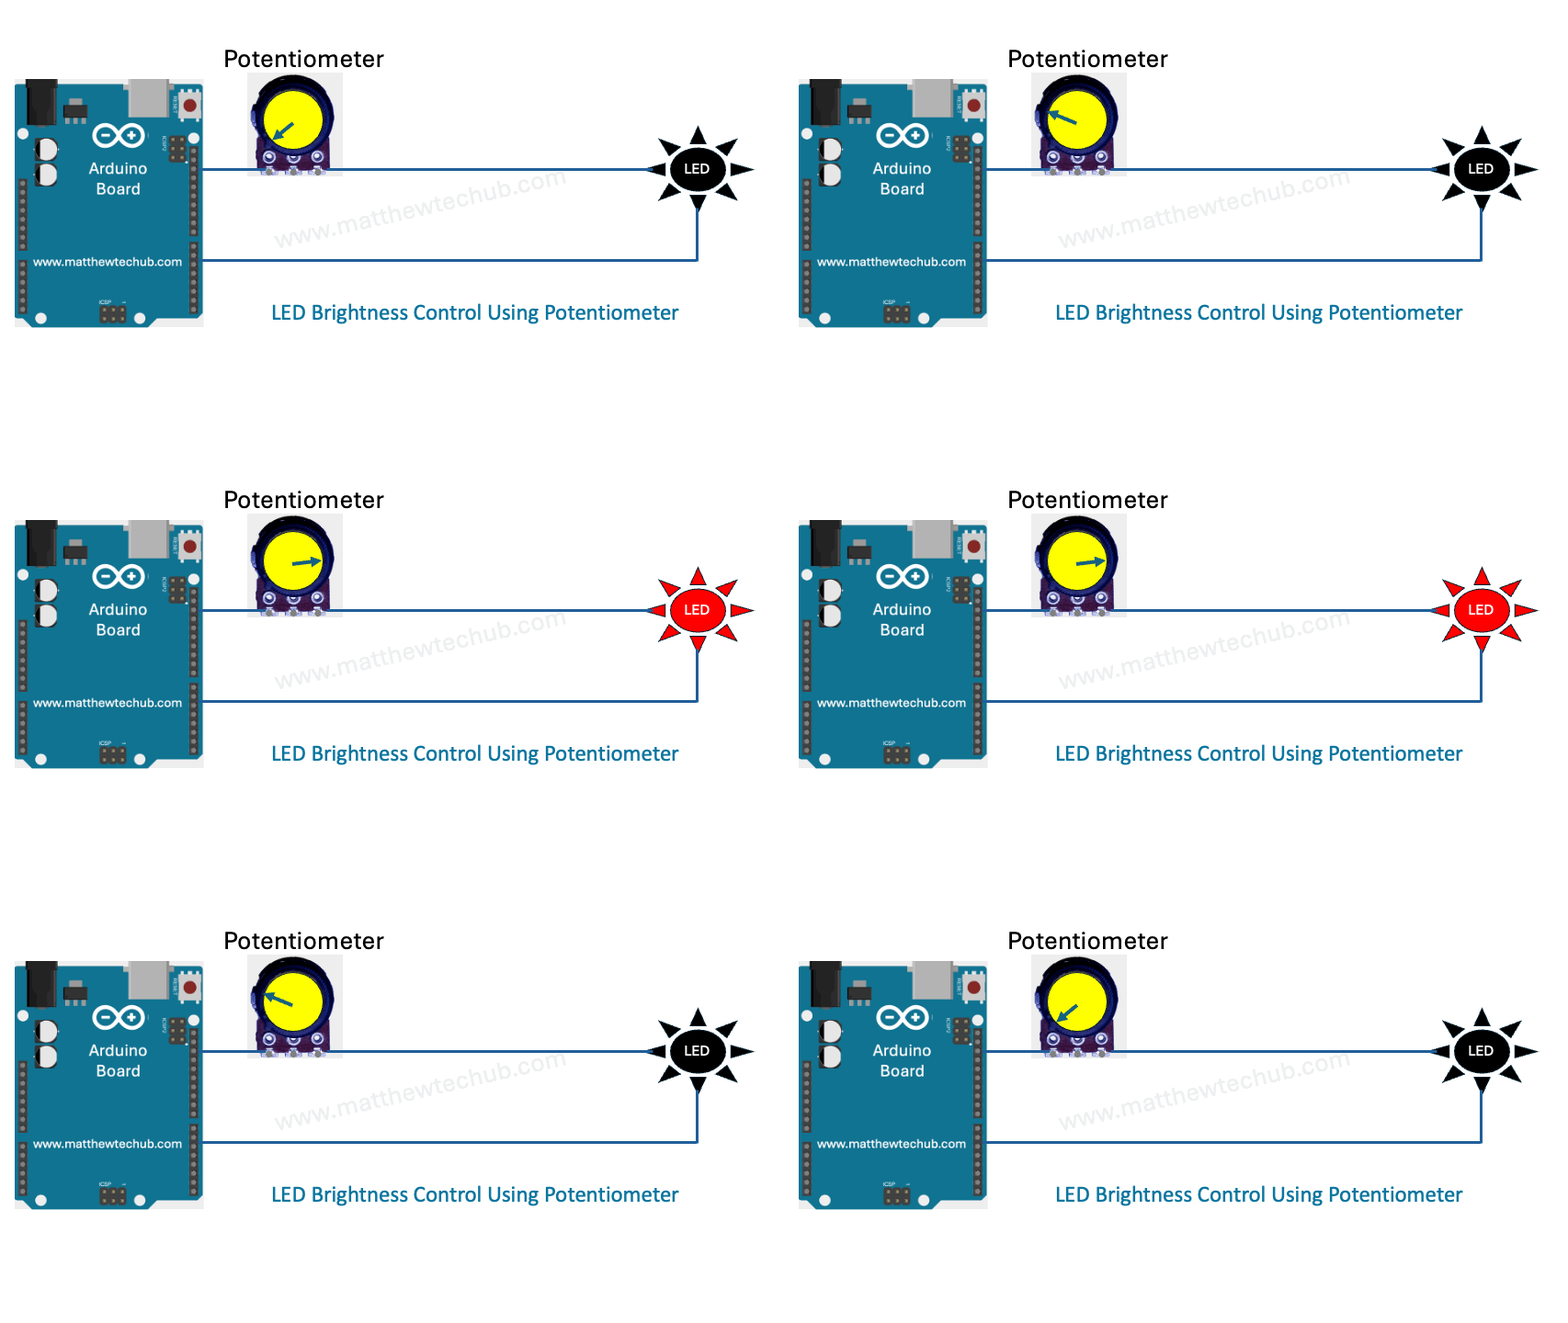
In this project, we will learn how to turn on an LED when the analog value from the middle pin of a potentiometer reaches a limit, while the potentiometer is used in a voltage divider circuit.
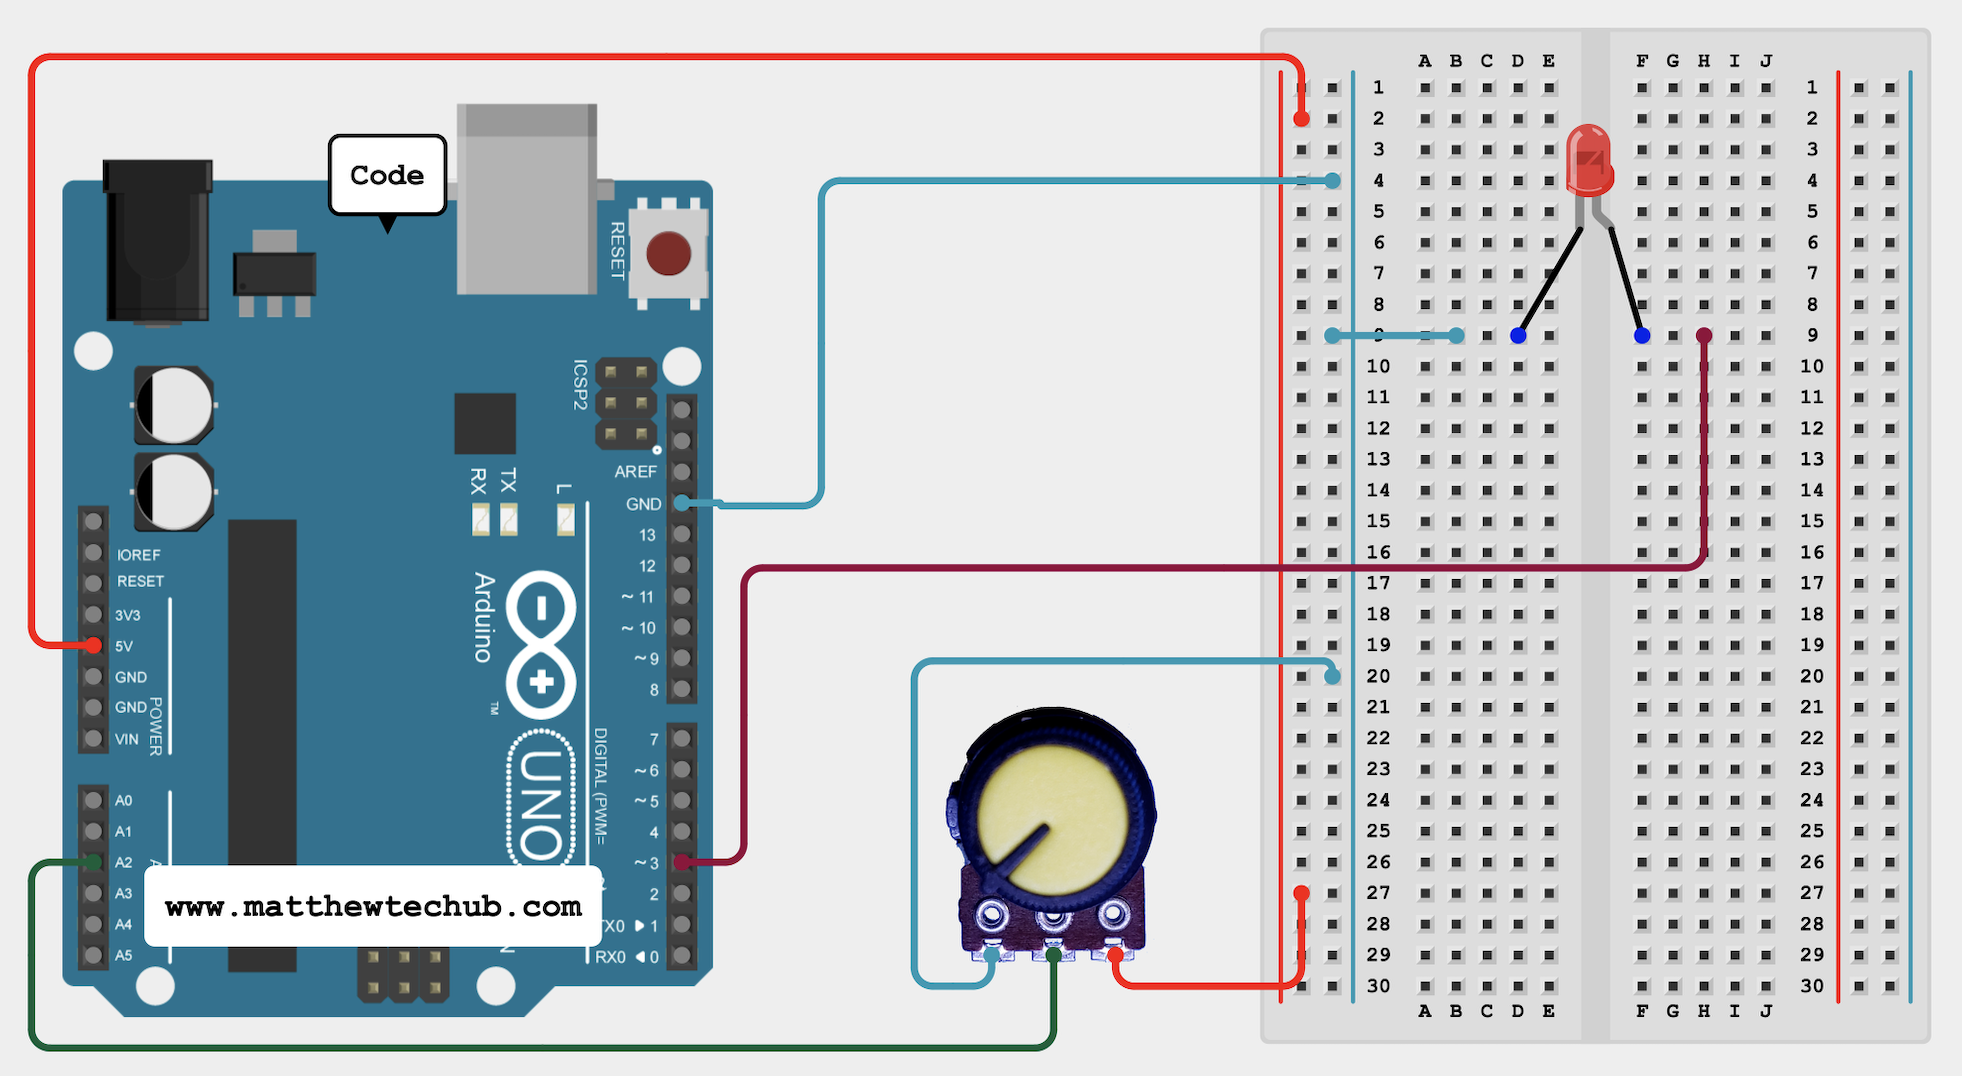
Circuit Wiring
Programme Code
// www.matthewtechub.com
// turn on lED when value reaches threshold, turn on lED
// ledPin - digital io pin
int analogPin=2;
int ledPin=3;
int value;
void setup() {
// put your setup code here, to run once:
pinMode(analogPin,INPUT);
pinMode(ledPin, OUTPUT);
Serial.begin(9600);
}
void loop() {
// put your main code here, to run repeatedly:
value=analogRead(analogPin);
if (value>200)
digitalWrite(ledPin,HIGH);
else
digitalWrite(ledPin,LOW);
Serial.println(value);
}Code Explanation
int analogPin = 2; // Pin connected to the potentiometer
int ledPin = 3; // Pin connected to the LED
int value; // Variable to store the analog reading
- analogPin: Defines the Arduino pin number (pin A2) to which the potentiometer is connected.
- ledPin: Defines the Arduino pin number (pin 3) to which the LED is connected.
· value: Integer variable used to store the analog reading obtained from the potentiometer.·
void setup() {
pinMode(analogPin, INPUT); // Configures analogPin as an input pin to read analog data
pinMode(ledPin, OUTPUT); // Configures ledPin as an output pin to control the LED
Serial.begin(9600); // Initializes serial communication with baud rate 9600
}
- pinMode(analogPin, INPUT);: Configures analogPin (pin A2) as an input pin, indicating it will read analog data from the potentiometer.
- pinMode(ledPin, OUTPUT);: Configures ledPin (pin 3) as an output pin, allowing it to control the LED.
- Serial.begin(9600);: Initializes serial communication between Arduino and the connected computer at a baud rate of 9600 bits per second. This allows data to be sent and received via the Serial Monitor for a reference.
void loop() {
value = analogRead(analogPin); // Reads the analog value from analogPin and stores it in ‘value’
if (value > 200) { // Checks if the analog value is greater than 200
digitalWrite(ledPin, HIGH); // Turns on the LED connected to ledPin
} else {
digitalWrite(ledPin, LOW); // Turns off the LED connected to ledPin
} Serial.println(value); // Prints the analog value stored in ‘value’ to the Serial Monitor // Delays for a short period before the next loop iteration
// This delay is added to stabilize the analog readings and for readability on the Serial Monitor delay(100); }
- analogRead(analogPin);: Reads the analog voltage value from the potentiometer connected to analogPin (pin 2) and assigns it to the variable value.
- LED Control:
- if (value > 200) { … }: Checks if the analog value (value) is greater than 200.
- digitalWrite(ledPin, HIGH);: If true, turns on the LED connected to ledPin (pin 3) by setting it to HIGH.
- digitalWrite(ledPin, LOW);: If false (analog value is 200 or less), turns off the LED connected to ledPin by setting it to LOW.
- Serial Output:
- Serial.println(value);: Prints the analog value stored in value to the Serial Monitor followed by a newline character (\n). This allows monitoring of the analog readings in real-time.

