About The Project
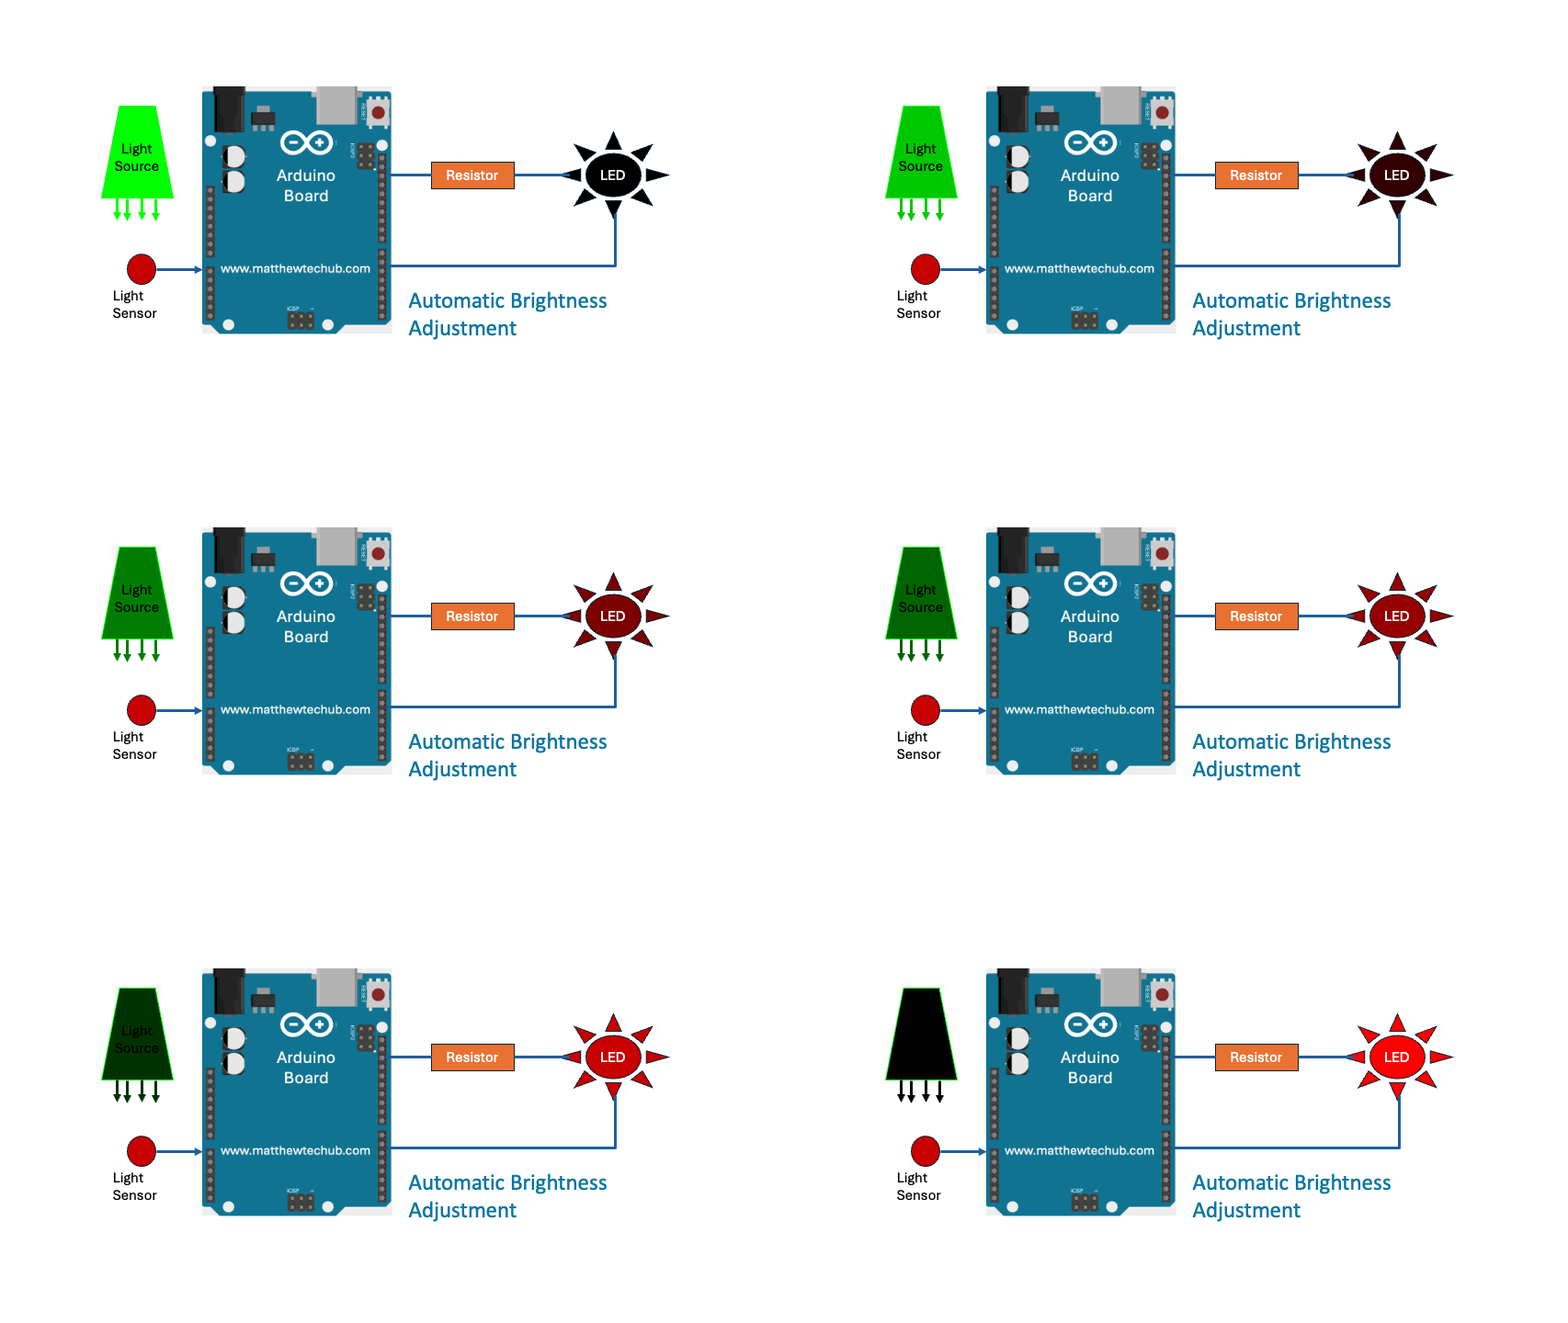
On a mobile phone screen, the brightness level increases as the ambient light level increases. In this project, we will control the brightness of an LED using an LDR. Similar to a mobile screen, the LED’s brightness will increase as the surrounding light level increases.
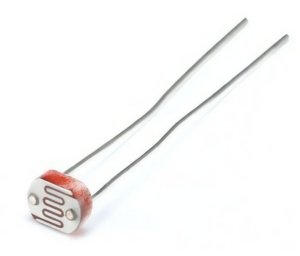
LDR

A Light Dependent Resistor (LDR), also known as a photoresistor or photoconductor, is a type of resistor whose resistance varies significantly with the amount of light falling on its surface.
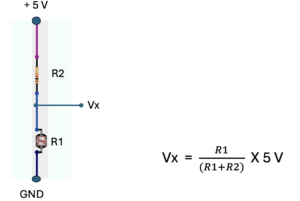
Voltage Dividing Circuit
A voltage divider circuit is used in light measurement with an LDR (Light Dependent Resistor) to convert the varying resistance of the LDR into a measurable voltage. The Arduino can read voltage levels through its analog input pins but cannot directly measure resistance.

Where R2= 1 K Ohms
R2 is the resistance of the LDR, that depends on the light intensity hit to its surface.
The Arduino reads this voltage (Vx) as an analog input, converting it to a digital value using its Analog to Digital Converter (ADC). The ADC outputs a value between 0 and 1023, corresponding to a voltage range of 0 to 5V.
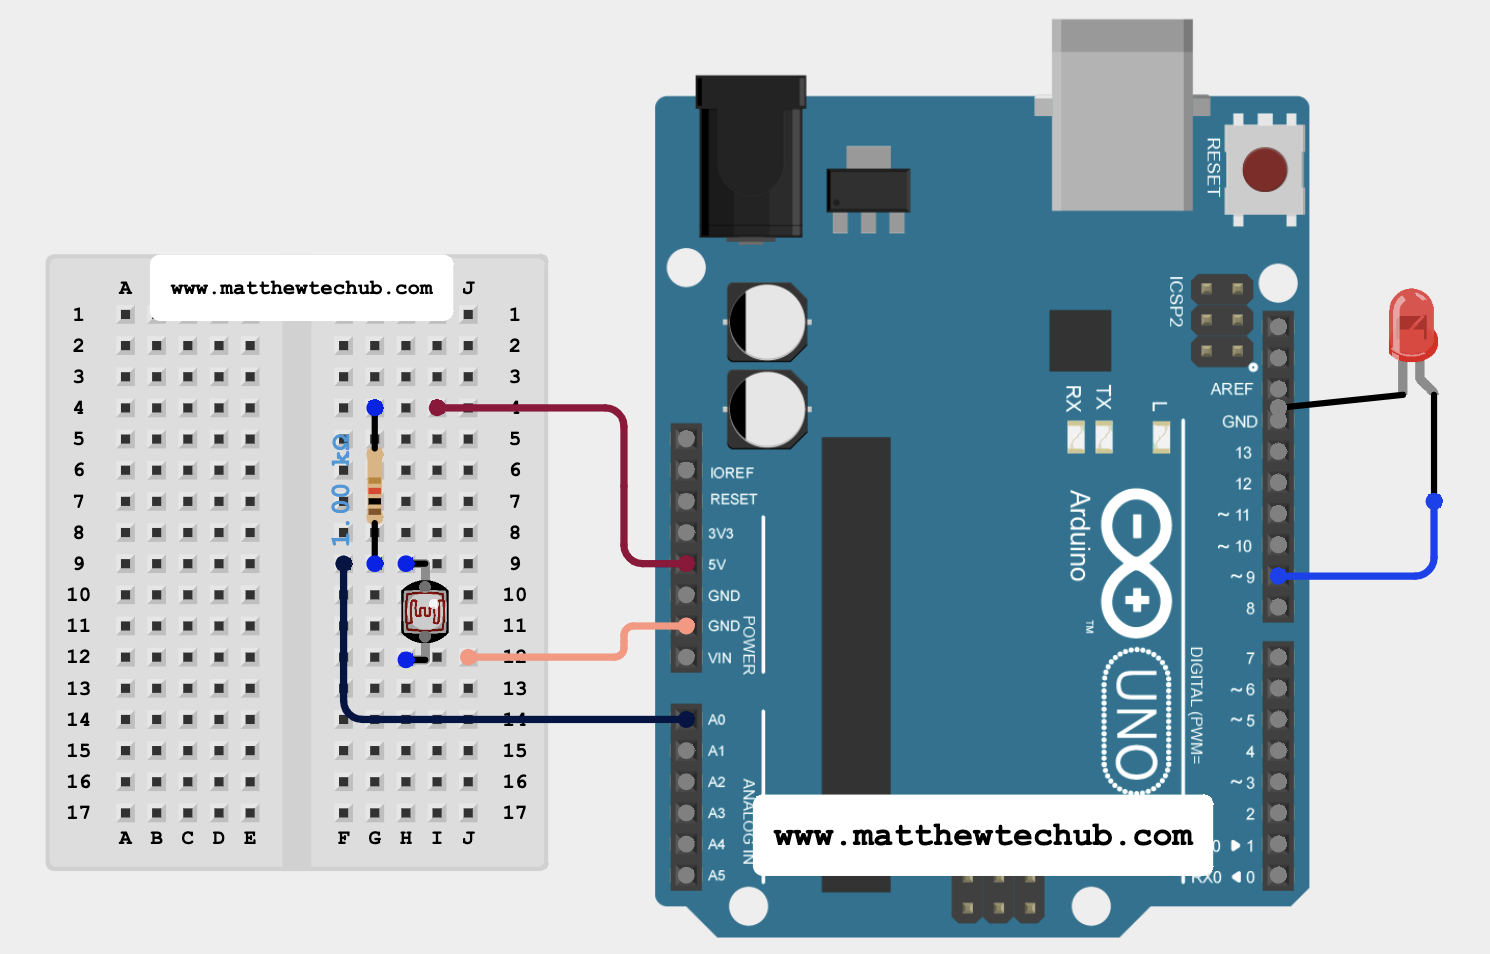
Circuit Wiring
Program Code
// www.matthewtechub.com
// LED Brightness Control using LDR

int sensorPin = A0;  // Pin connected to LDR
int ledPin = 9;      // Pin connected to LED (PWM pin)
int sensorValue;     // Variable to store the value from the LDR
int ledBrightness;   // Variable to store the LED brightness

void setup() {
  // Initialize serial communication at 9600 baud rate
  Serial.begin(9600);
  // Set the LED pin as output
  pinMode(ledPin, OUTPUT);
}

void loop() {
  // Read the analog value from the LDR
  sensorValue = analogRead(sensorPin);

  /* Map the LDR value (0-1023) to
  an LED brightness value (0-255) */
  ledBrightness = map(sensorValue, 0, 1023, 255, 0);

  // Set the brightness of the LED
  analogWrite(ledPin, ledBrightness);

  /* Print the sensor value and LED
  brightness to the Serial Monitor */
  Serial.print("Sensor Value: ");
  Serial.print(sensorValue);
  Serial.print("\t LED Brightness: ");
  Serial.println(ledBrightness);

  // Wait for a short period before taking another reading
  delay(200);
}
This code controls the brightness of an LED using a Light Dependent Resistor (LDR). The LDR senses the ambient light level, and the LED’s brightness adjusts accordingly.
Code Explanation
int sensorPin = A0;
int ledPin = 9;
int sensorValue;
int ledBrightness;
Declaration
- sensorPin: The analog pin connected to the LDR.
- ledPin: The PWM pin connected to the LED.
- sensorValue: Stores the analog value read from the LDR.
- ledBrightness: Stores the brightness value to be applied to the LED.
void setup() {
  // Initialize serial communication at 9600 baud rate
  Serial.begin(9600);
  // Set the LED pin as output
  pinMode(ledPin, OUTPUT);
}
setup():
- Initializes serial communication for debugging purposes.
- Sets the LED pin as an output.
void loop() {
  // Read the analog value from the LDR
  sensorValue = analogRead(sensorPin);

  /* Map the LDR value (0-1023) to
  an LED brightness value (0-255) */
  ledBrightness = map(sensorValue, 0, 1023, 255, 0);

  // Set the brightness of the LED
  analogWrite(ledPin, ledBrightness);

  /* Print the sensor value and LED
  brightness to the Serial Monitor */
  Serial.print("Sensor Value: ");
  Serial.print(sensorValue);
  Serial.print("\t LED Brightness: ");
  Serial.println(ledBrightness);

  // Wait for taking another reading
  delay(200);
}
- Reads the analog value from the LDR.
- Maps the LDR value to a brightness value for the LED. The map function is used to scale the 0-1023 LDR range to a 0-255 range for PWM. The mapping is inverted so that the LED becomes darker as it gets darker.
- Sets the LED brightness using analogWrite().
- Prints the sensor value and LED brightness to the Serial Monitor.
- Waits for 200 milliseconds before taking another reading.
Try Yourself
Try to control the brightness of OLED.

