About The Project
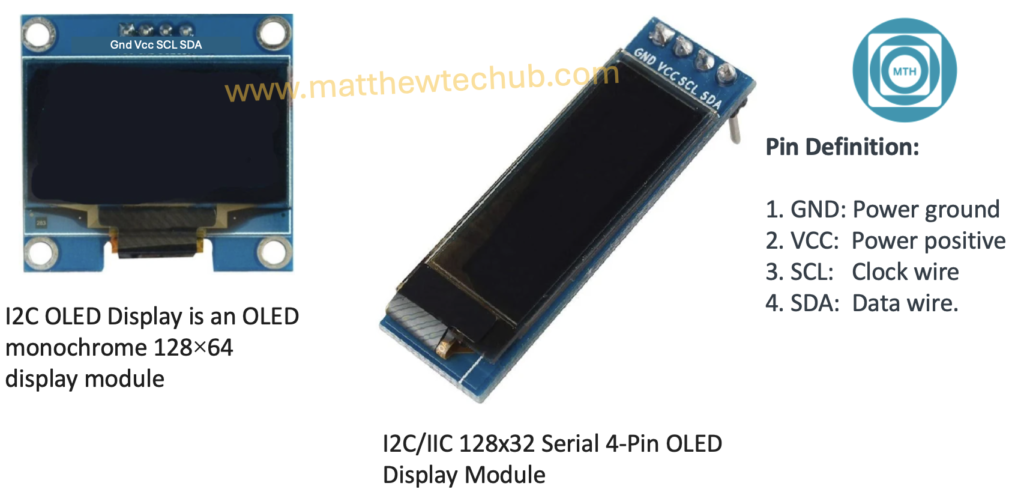
An OLED (Organic Light Emitting Diode) display is a type of screen technology that uses organic compounds to produce light when an electric current is applied. OLED displays are known for their high contrast ratios, vibrant colours, and the ability to be very thin and flexible. They are commonly used in smartphones, TVs, wearable devices, and various electronics projects.
- Monochrome: This means the display shows images in a single colour (usually white, but sometimes blue or yellow) on a black background. Monochrome displays are simpler and consume less power than full-colour displays.
- 128×64 Resolution: This indicates that the display has 128 pixels horizontally and 64 pixels vertically. The resolution determines the amount of detail that can be displayed. A 128×64 resolution is sufficient for displaying text, simple graphics, and basic animations.
- I2C (Inter-Integrated Circuit): I2C is a communication protocol that allows multiple devices to be connected to the same bus using only two wires: Serial Data (SDA) and Serial Clock (SCL). It’s commonly used for interfacing with sensors, displays, and other peripherals.
- Advantages: I2C is simple to implement, requires only two wires, supports multiple devices on the same bus, and can achieve moderate data transfer speeds.
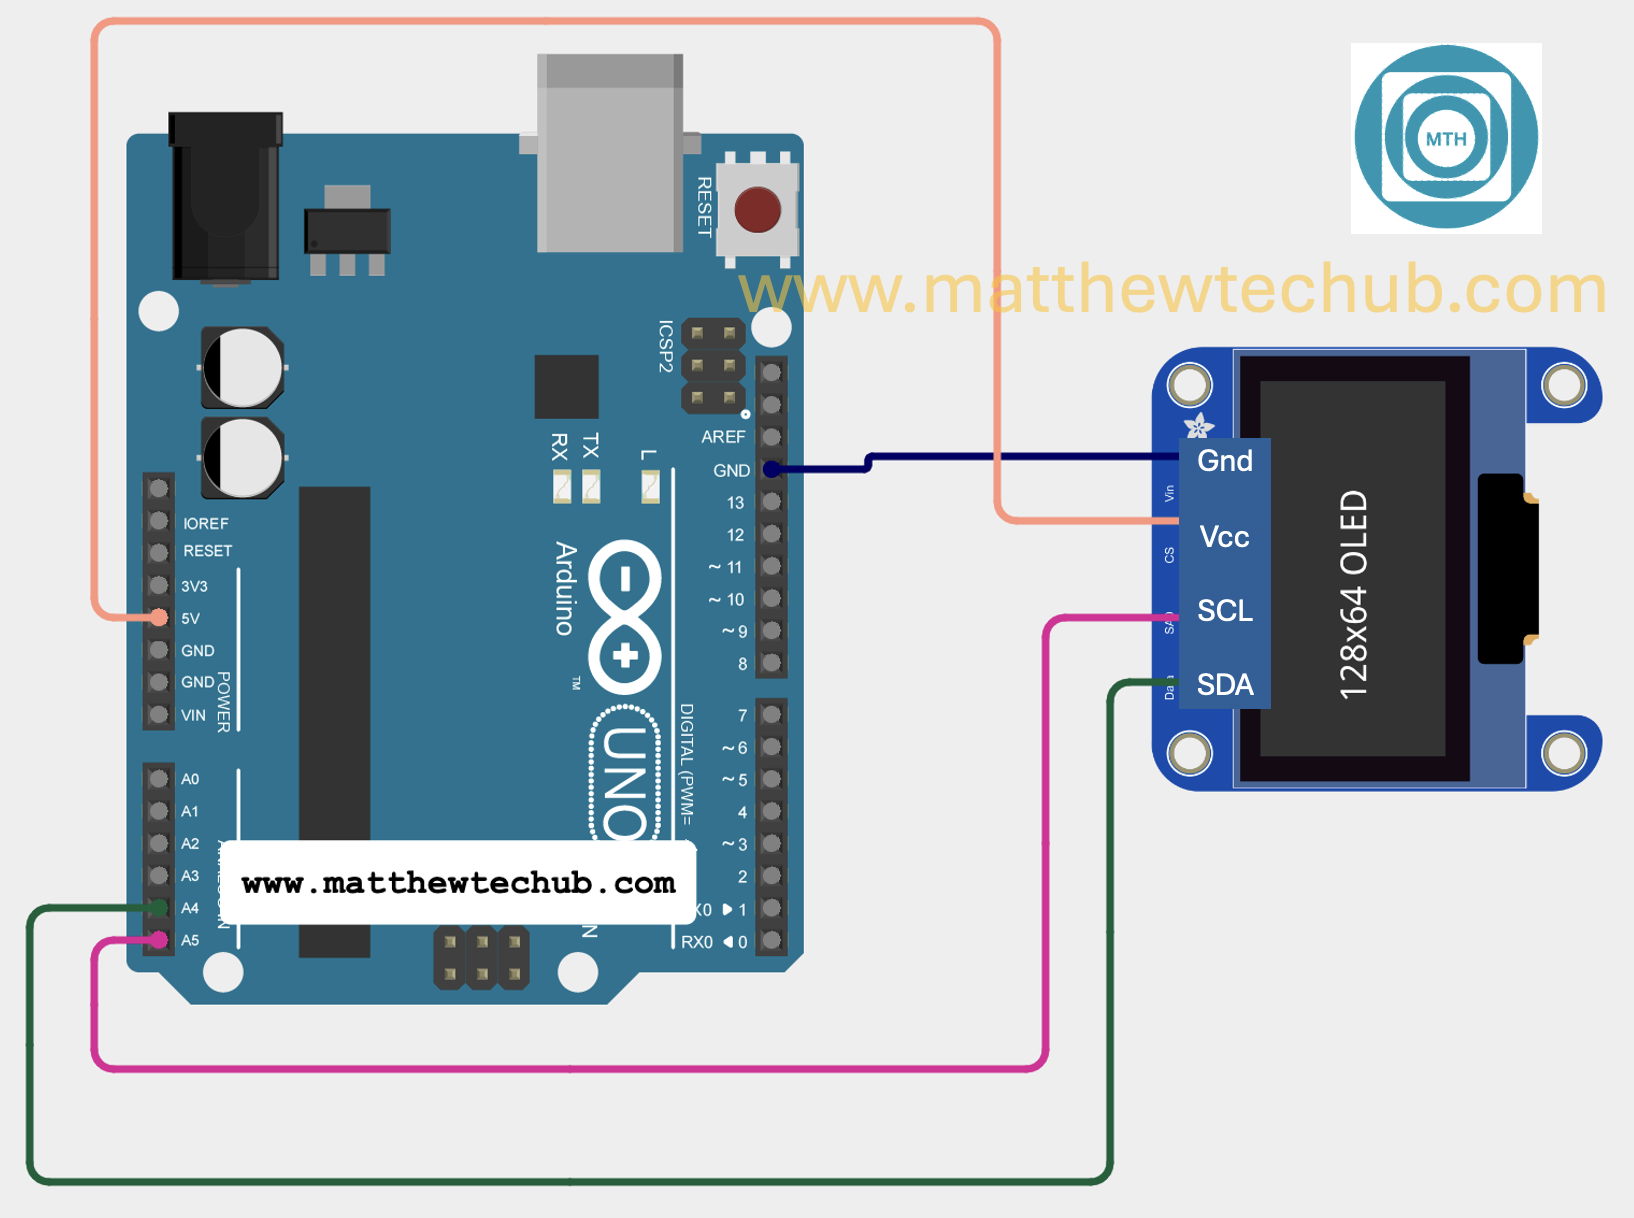
Circuit Wiring
Steps to Add the OLED Library
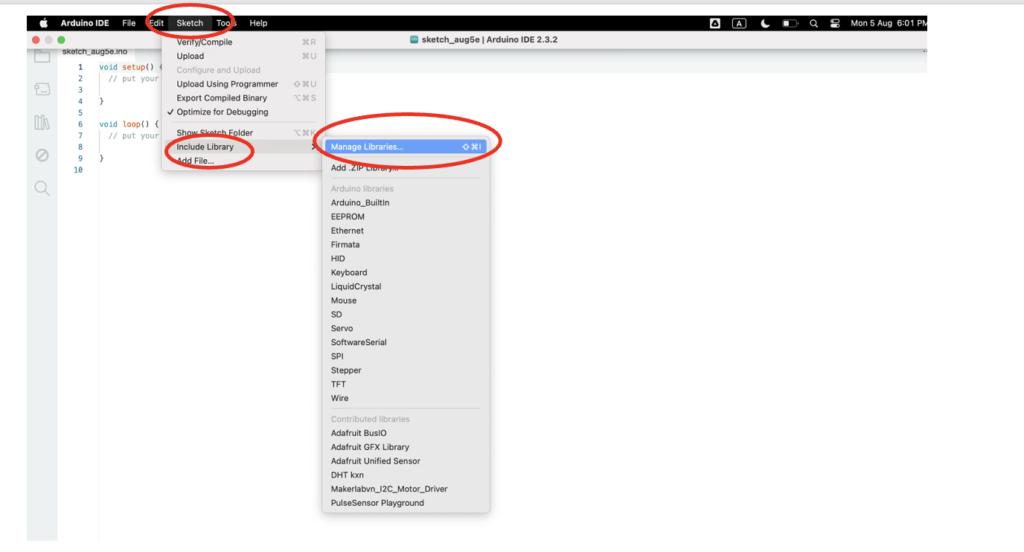
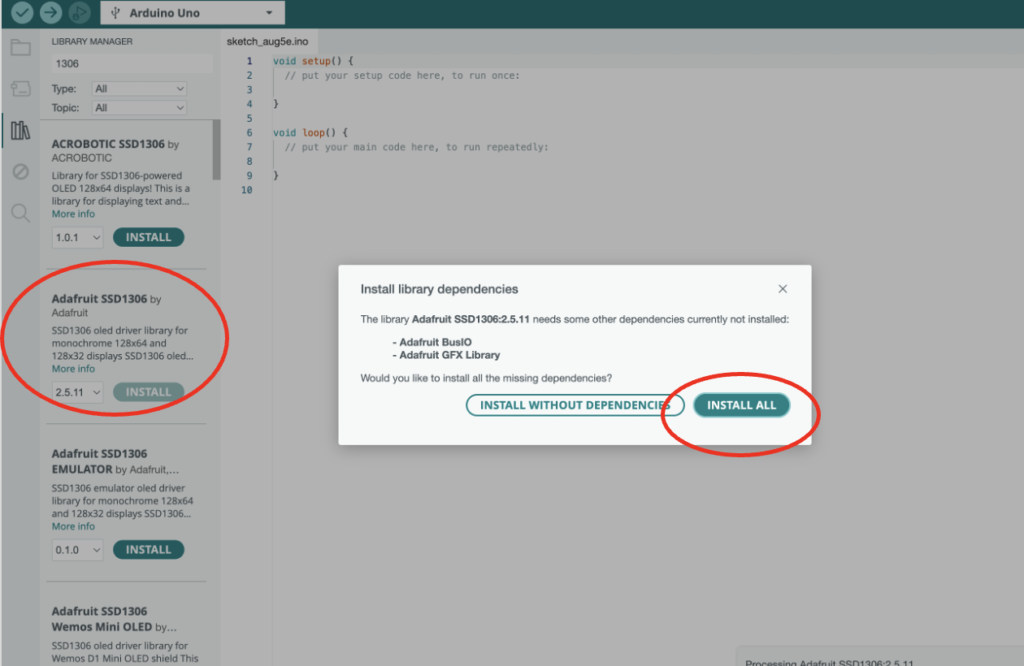
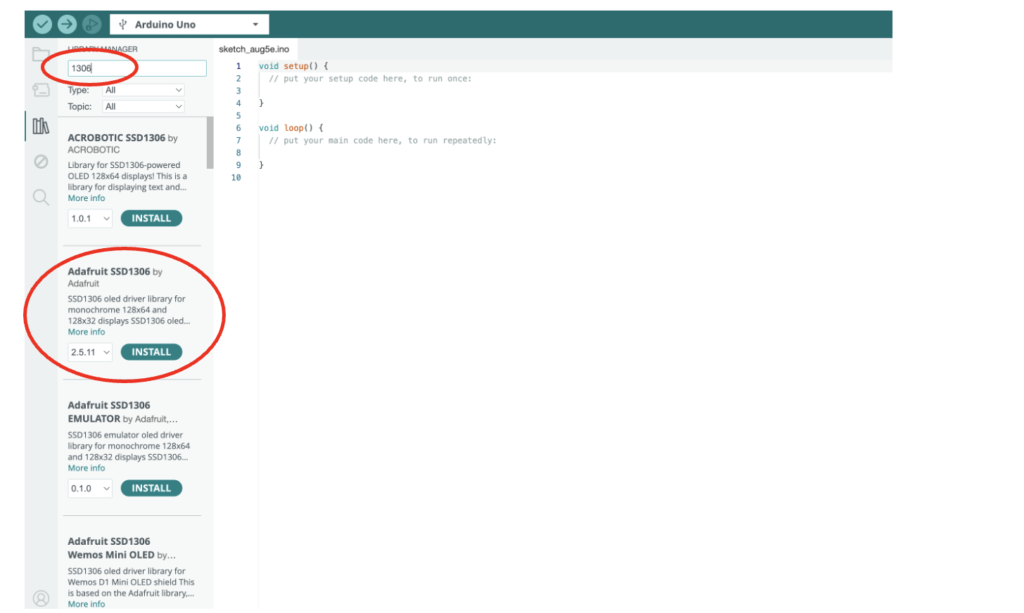
To use the OLED display with your Arduino, you need to install the necessary libraries and include their header files in your code. Here are the detailed steps to add the Adafruit SSD1306 OLED library:
- Install the Adafruit SSD1306 Library
- Open the Arduino IDE.
- Go to the Library Manager:
- Click on Sketch in the menu bar.
- Select Include Library.
- Click on Manage Libraries….
3. Search for the SSD1306 Library:
- In the Library Manager window, type Adafruit SSD1306 in the search bar.
- Find the Adafruit SSD1306 library by Adafruit in the list.
- Click on the library, then click Install.
4. Install the Adafruit GFX Library:
- Similarly, search for Adafruit GFX in the Library Manager.
- Find the Adafruit GFX library by Adafruit and click Install.
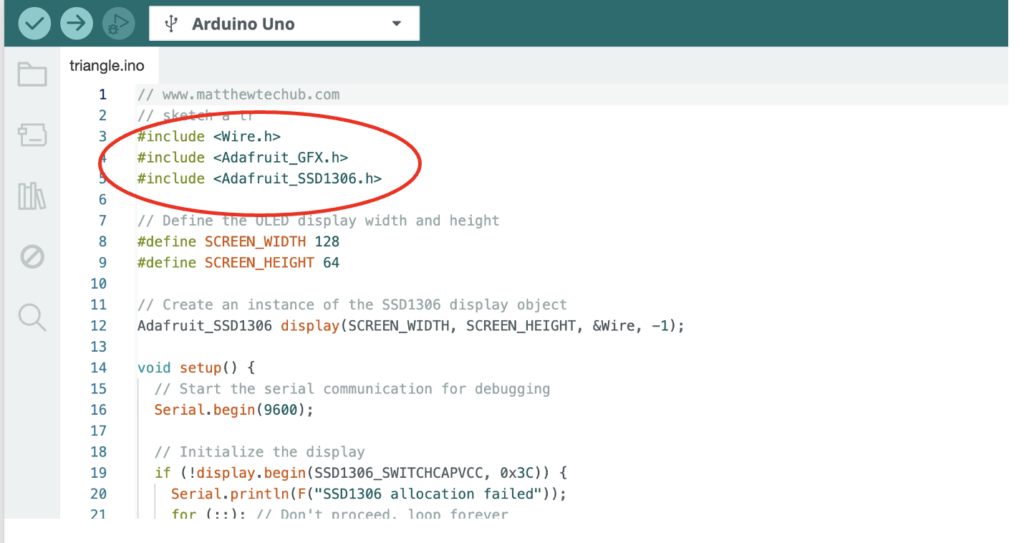
4. Include the Header Files in Your Code
After installing the libraries, you need to include their header files in your Arduino sketch:
#include <Wire.h>
#include <Adafruit_GFX.h>
#include <Adafruit_SSD1306.h>About The Program
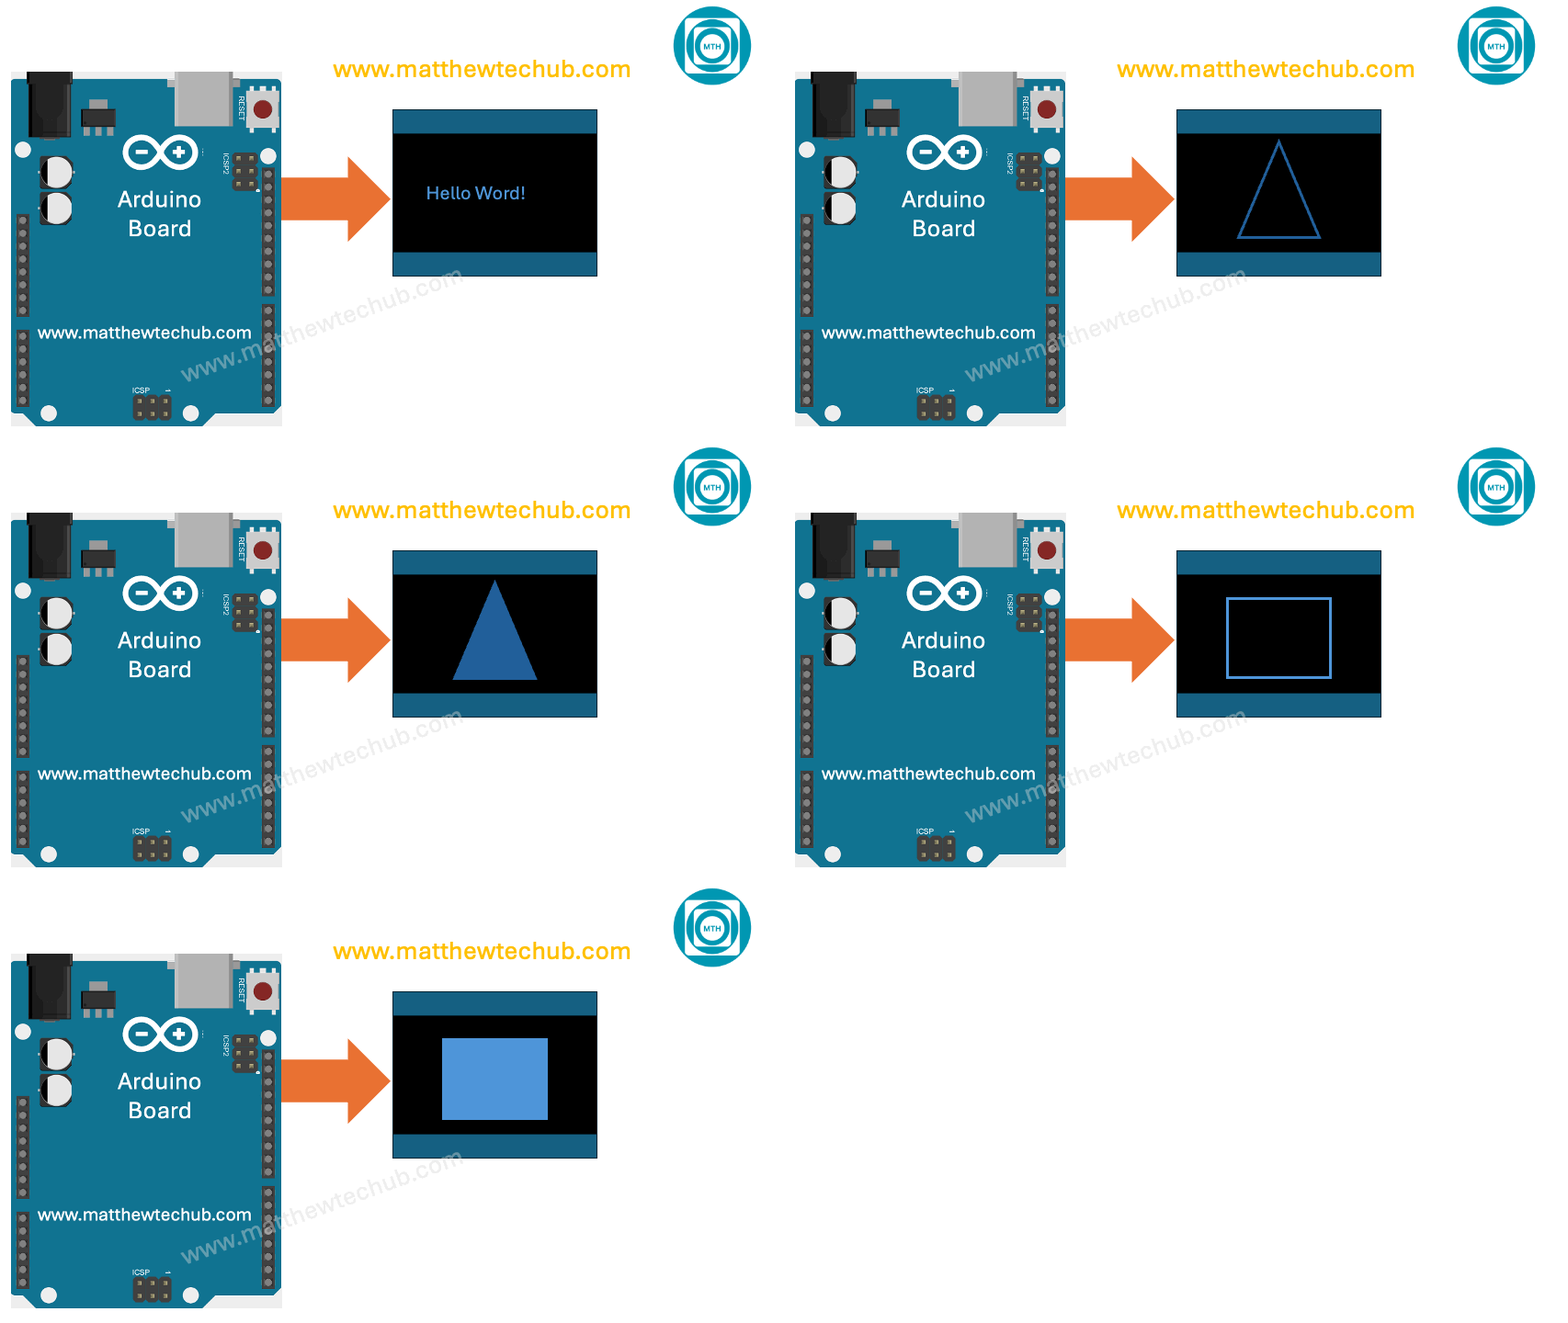
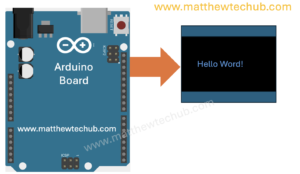
In this program, we are learning how to display the text message “Hello World!” on an OLED display.
Program Code
// www.matthewtechub.com
// hello world
#include <Wire.h>
#include <Adafruit_GFX.h>
#include <Adafruit_SSD1306.h>

#define SCREEN_WIDTH 128
#define SCREEN_HEIGHT 64
Adafruit_SSD1306 display(SCREEN_WIDTH, SCREEN_HEIGHT, &Wire, -1);

void setup() {
  Serial.begin(9600);
  if (!display.begin(SSD1306_SWITCHCAPVCC, 0x3C)) {
    Serial.println(F("SSD1306 allocation failed"));
    for (;;);
  }

  // Clear the buffer to ensure the display starts with a clean state
  display.clearDisplay();

  // Set text size and color
  display.setTextSize(1); // Normal 1:1 pixel scale
  display.setTextColor(SSD1306_WHITE); // Draw white text

  // Set cursor position and display text
  display.setCursor(0, 0); // Start at the very top of the display
  display.println(F("Hello, World!"));

  // Display the buffer on the screen
  display.display();
}

void loop() {
  // Nothing to do here
}Code Explanation
Includes and Definitions
#include <Wire.h>
#include <Adafruit_GFX.h>
#include <Adafruit_SSD1306.h>- Wire.h: This library is used for I2C communication, which is a protocol for interfacing with the OLED display.
- –Adafruit_GFX.h : This is a core graphics library that provides common graphics functions (e.g., drawing lines, circles, text).
- Adafruit_SSD1306.h : This library specifically supports the SSD1306 OLED display.
#define SCREEN_WIDTH 128
#define SCREEN_HEIGHT 64- These define the width and height of the OLED display in pixels.
Adafruit_SSD1306 display(SCREEN_WIDTH, SCREEN_HEIGHT, &Wire, -1);- This creates an instance of the `Adafruit_SSD1306` display object, specifying the screen dimensions, the I2C communication interface (`&Wire`), and the reset pin (set to `-1` indicating no reset pin is used).
Setup Function
void setup() {
Serial.begin(9600);- Initializes serial communication at a baud rate of 9600 for debugging purposes.
  if(!display.begin(SSD1306_SWITCHCAPVCC, 0x3C)) {
    Serial.println(F("SSD1306 allocation failed"));
    for(;;); // Don't proceed, loop forever
}Initializes the OLED display with display.begin().
- SSD1306_SWITCHCAPVCC specifies the use of the internal charge pump to generate the display voltage.
- 0x3C is the I2C address of the OLED display.
- If initialization fails, it prints “SSD1306 allocation failed” to the serial monitor and enters an infinite loop (for(;;);).
display.clearDisplay();- Clears the display buffer to ensure the screen is blank before starting.
  display.setTextSize(1);
  display.setTextColor(SSD1306_WHITE);
The setTextSize() function in the Adafruit GFX library allows you to scale the text size on the OLED display. The function accepts an integer value that scales the text by that factor. Here is a list of the text sizes and what they correspond to:
- setTextSize(1): This sets the text to the default size, which is 6×8 pixels (width x height). This means each character will occupy a 6×8 pixel area on the display.
- setTextSize(2): This doubles the size of the text, making each character 12×16 pixels.
- setTextSize(3): This triples the size of the text, making each character 18×24 pixels.
- setTextSize(4): This quadruples the size of the text, making each character 24×32
- setTextSize(n): You can continue to increase the text size by setting n to any positive integer. The text will be scaled by the specified factor.
The setTextColor() function in the Adafruit GFX library is used to set the color of the text that will be displayed on the screen. For monochrome OLED displays like the SSD1306, the available colors are typically limited to the following:
- SSD1306_WHITE: This sets the text color to white. On a monochrome OLED display, this will make the text appear as white pixels on a black background.
- SSD1306_BLACK: This sets the text color to black. On a monochrome OLED display, this will make the text “invisible” or effectively clear the area where the text is drawn.
display.setCursor(0, 0); // Start at the very top of the display- Sets the cursor position to very top of the display.
The display.setCursor(x, y) function in the Adafruit GFX library sets the position of the cursor for text rendering on the OLED display. The coordinates (x, y) specify the pixel location on the display where the next text output will start.
- x (horizontal position): This parameter sets the horizontal position (in pixels) from the left edge of the display.
- x = 0 means the cursor is set to the far-left side of the display.
- Increasing the value of x moves the cursor to the right.
- y (vertical position): This parameter sets the vertical position (in pixels) from the top edge of the display.
- y = 0 means the cursor is set to the top edge of the display.
- Increasing the value of y moves the cursor down.
display.println(F("Hello, World!"));- Writes “Hello, World!” to the display buffer at the current cursor position.
  display.display();
}- Displays the content of the buffer on the OLED screen.
Loop Function
void loop() {
  // Nothing to do here
}- The `loop()` function is empty because we only need to display the text once, which was handled in the `setup()` function.
Summary
- Setup: Initializes serial communication and the OLED display, clears the screen, sets text size and color, positions the cursor, prints “Hello, World!” to the display buffer, and then displays it on the screen.
- Loop: Left empty since the display task is already completed in the setup.
This program demonstrates the basic usage of the Adafruit SSD1306 library to display text on an OLED screen connected via I2C.
Program: Sketch Triangle on OLED
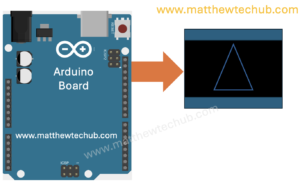
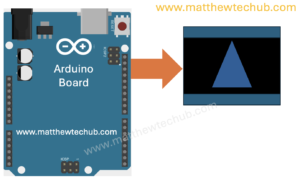
In this program, we will learn how to display a triangle on an OLED display.
Program Code ( Triangle)
// www.matthewtechub.com
// triangle sketch
#include <Wire.h>
#include <Adafruit_GFX.h>
#include <Adafruit_SSD1306.h>
// Define the OLED display width and height
#define SCREEN_WIDTH 128
#define SCREEN_HEIGHT 64

// Create an instance of the SSD1306 display object
Adafruit_SSD1306 display(SCREEN_WIDTH, SCREEN_HEIGHT, &Wire, -1);

void setup() {
  // Start the serial communication for debugging
  Serial.begin(9600);

  // Initialize the display
  if (!display.begin(SSD1306_SWITCHCAPVCC, 0x3C)) {
    Serial.println(F("SSD1306 allocation failed"));
    for (;;); // Don't proceed, loop forever
  }

  // Clear the display buffer
  display.clearDisplay();

  // Set coordinates for the triangle vertices
  int x0 = 64, y0 = 0;    // Top vertex
  int x1 = 0, y1 = 63;    // Bottom-left vertex
  int x2 = 127, y2 = 63;  // Bottom-right vertex

  // Draw the triangle outline
  display.drawTriangle(x0, y0, x1, y1, x2, y2, SSD1306_WHITE);

  // Display the buffer on the screen
  display.display();
}

void loop() {
  // Nothing to do here
}
Code Explanation
The code is designed to use the Adafruit SSD1306 library to draw an outline of a triangle on an OLED display. It initializes the display, draws the triangle, and then keeps the display static as no further actions are performed in the `loop()` function.
Include Libraries:
#include <Wire.h>
#include <Adafruit_GFX.h>
#include <Adafruit_SSD1306.h>- `Wire.h`: Handles communication with the OLED display using the I2C protocol.
- `Adafruit_GFX.h`: Provides basic graphics functions like drawing shapes and text.
- `Adafruit_SSD1306.h`: Specific to the SSD1306 OLED display, offering functions to control it.
Define Display Size
#define SCREEN_WIDTH 128
#define SCREEN_HEIGHT 64- ‘SCREEN_WIDTH`:** Width of the display in pixels (128 pixels).
- ‘SCREEN_HEIGHT`:** Height of the display in pixels (64 pixels).
Create Display Object
Adafruit_SSD1306 display(SCREEN_WIDTH, SCREEN_HEIGHT, &Wire, -1);- `display`: An instance of the `Adafruit_SSD1306` class.
- `SCREEN_WIDTH` and `SCREEN_HEIGHT` define the dimensions of the display.
- `&Wire` specifies the I2C communication interface.
- -1` is used to specify that the reset pin is not connected (for I2C communication).
Setup Function
void setup() {
  Serial.begin(9600);
  if (!display.begin(SSD1306_SWITCHCAPVCC, 0x3C)) {
    Serial.println(F("SSD1306 allocation failed"));
    for (;;); // Don't proceed, loop forever
  }
  display.clearDisplay();

  int x0 = 64, y0 = 0;    // Top vertex
  int x1 = 0, y1 = 63;    // Bottom-left vertex
  int x2 = 127, y2 = 63;  // Bottom-right vertex

  display.drawTriangle(x0, y0, x1, y1, x2, y2, SSD1306_WHITE);
  display.display();
}- `Serial.begin(9600);`:** Starts serial communication at a baud rate of 9600 for debugging purposes.
- `display.begin(SSD1306_SWITCHCAPVCC, 0x3C);`:** Initializes the OLED display. `SSD1306_SWITCHCAPVCC` is the power supply method, and `0x3C` is the I2C address of the display.
- If initialization fails, an error message is printed to the serial monitor, and the program enters an infinite loop.
- `display.clearDisplay();`:** Clears the display buffer to ensure no previous data is shown.
- `display.drawTriangle(x0, y0, x1, y1, x2, y2, SSD1306_WHITE);`:** Draws the outline of a triangle:
- `(x0, y0)` is the top vertex.
- `(x1, y1)` is the bottom-left vertex.
- `(x2, y2)` is the bottom-right vertex.
- -`SSD1306_WHITE` specifies the color of the triangle (white) since the OLED is monochrome.
- `display.display();`: Updates the display with the contents of the buffer.
Loop Function
void loop() {
  // Nothing to do here
}- Empty: The `loop()` function is empty because no continuous actions are required. The triangle is drawn once in `setup()` and remains static on the display.
Summary
The code initializes the OLED display, clears any previous content, draws a white triangle outline, and updates the display to show the triangle. The `loop()` function does nothing in this example because the display content remains unchanged.
Sketch Filled triangle
In this program, we will learn how to display a filled triangle on an OLED display.
Program Code
//www.matthewtechub.com
// filled triangular
#include <Wire.h>
#include <Adafruit_GFX.h>
#include <Adafruit_SSD1306.h>

// Define the OLED display width and height
#define SCREEN_WIDTH 128
#define SCREEN_HEIGHT 64

// Create an instance of the SSD1306 display object
Adafruit_SSD1306 display(SCREEN_WIDTH, SCREEN_HEIGHT, &Wire, -1);

void setup() {
  // Start the serial communication for debugging
  Serial.begin(9600);

  // Initialize the display
  if (!display.begin(SSD1306_SWITCHCAPVCC, 0x3C)) {
    Serial.println(F("SSD1306 allocation failed"));
    for (;;); // Don't proceed, loop forever
  }

  // Clear the display buffer
  display.clearDisplay();

  // Set coordinates for the triangle vertices
  int x0 = 64, y0 = 0;    // Top vertex
  int x1 = 0, y1 = 63;    // Bottom-left vertex
  int x2 = 127, y2 = 63;  // Bottom-right vertex

  // Draw a filled triangle
  display.fillTriangle(x0, y0, x1, y1, x2, y2, SSD1306_WHITE);

  // Display the buffer on the screen
  display.display();
}

void loop() {
  // Nothing to do here
}A Brief Code Explanation
- Libraries:
- `Wire.h`: Handles I2C communication.
- `Adafruit_GFX.h`: Provides basic graphics functions.
- `Adafruit_SSD1306.h`: Manages the SSD1306 OLED display.
- Display Setup:
- ‘Adafruit_SSD1306 display(SCREEN_WIDTH, SCREEN_HEIGHT, &Wire, -1);` creates an instance of the display object for a 128×64 OLED screen.
- setup()` Function:
- Initializes serial communication for debugging.
- Initializes the OLED display. If initialization fails, it enters an infinite loop.
- Clears the display.
- Draws a filled white triangle with vertices at `(64,0)`, `(0,63)`, and `(127,63)`.
- Updates the display to show the triangle.
- loop()` Function:
- Remains empty because the display content does not need to be updated continuously.
Key Functions:
- `display.fillTriangle(x0, y0, x1, y1, x2, y2, SSD1306_WHITE);` draws a filled white triangle on the display.
Line Box Sketch Program
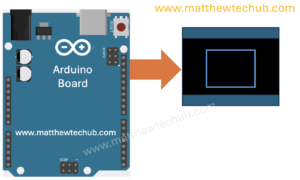
In this program, we will learn how to display a line box on an OLED display.
Program Code
// www.matthewtechub.com
// line box
#include <Wire.h>
#include <Adafruit_GFX.h>
#include <Adafruit_SSD1306.h>

// Define the OLED display width and height
#define SCREEN_WIDTH 128
#define SCREEN_HEIGHT 64

// Create an instance of the SSD1306 display object
Adafruit_SSD1306 display(SCREEN_WIDTH, SCREEN_HEIGHT, &Wire, -1);

void setup() {
  // Start the serial communication for debugging
  Serial.begin(9600);

  // Initialize the display
  if (!display.begin(SSD1306_SWITCHCAPVCC, 0x3C)) {
    Serial.println(F("SSD1306 allocation failed"));
    for (;;); // Don't proceed, loop forever
  }

  // Clear the display buffer
  display.clearDisplay();

  // Set coordinates for the rectangle
  int x = 10, y = 10;           // Top-left corner
  int width = 100, height = 40; // Width and height of the rectangle

  // Draw a rectangular outline
  display.drawRect(x, y, width, height, SSD1306_WHITE);

  // Display the buffer on the screen
  display.display();
}

void loop() {
  // Nothing to do here
}
Explanation ( Line Box)
- Libraries:
- Wire.h: For I2C communication.
- Adafruit_GFX.h: Provides basic graphics functions.
- Adafruit_SSD1306.h: Manages the OLED display.
- Display Setup:
- Adafruit_SSD1306 display(SCREEN_WIDTH, SCREEN_HEIGHT, &Wire, -1); initializes the display object for a 128×64 pixel OLED screen.
- setup() Function:
- Serial.begin(9600); starts serial communication for debugging.
- display.begin(SSD1306_SWITCHCAPVCC, 0x3C); initializes the display. If initialization fails, the program enters an infinite loop.
- display.clearDisplay(); clears any previous content on the display.
- display.drawRect(x, y, width, height, SSD1306_WHITE); draws a rectangular outline. The rectangle starts at (x, y), has a specified width and height, and is drawn in white.
- display.display(); updates the display to show the rectangle.
- loop() Function:
- Remains empty as the rectangle is drawn once in the setup() function and does not need to be updated continuously.
If you need a filled rectangle, replace:
display.drawRect(x, y, width, height, SSD1306_WHITE);with:
display.fillRect(x, y, width, height, SSD1306_WHITE);This will fill the rectangle with white colour instead of just drawing its outline.
Try Yourself
Try to display other shapes such as circle, filled circle etc.
