About the Project
In this project, we will learn how to verify a password entered via the keypad. When the correct password is entered, an LED will turn on. If the wrong password is entered, the buzzer will beep twice.
Keypad


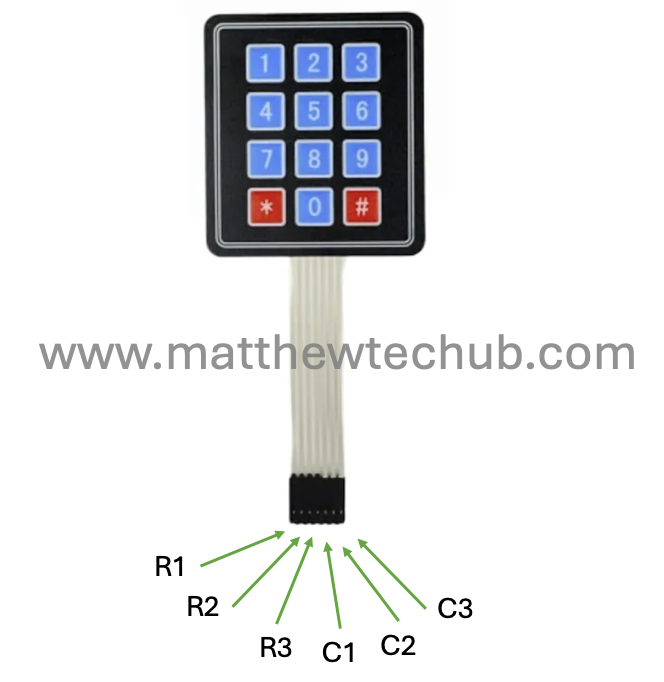
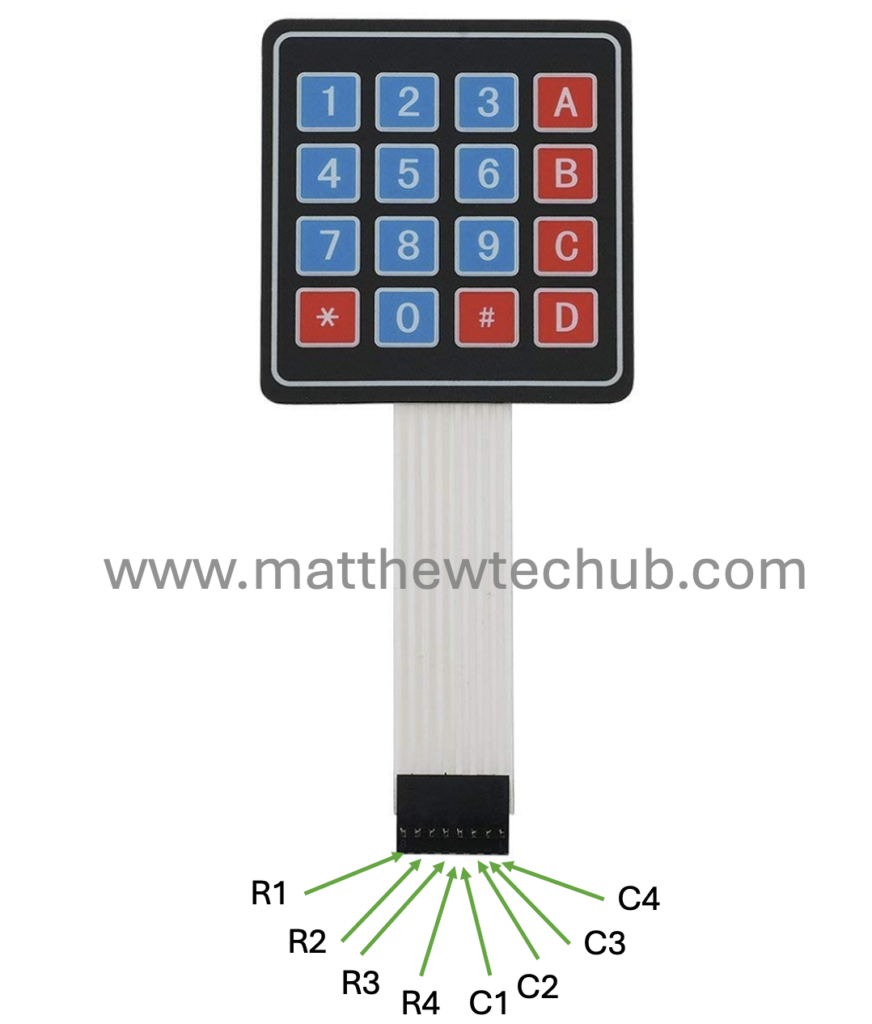
A basic keypad consists of button switches arranged in a matrix of rows and columns. When a key is pressed, it creates a connection between a specific row and column, which the microcontroller detects to determine which key was pressed.
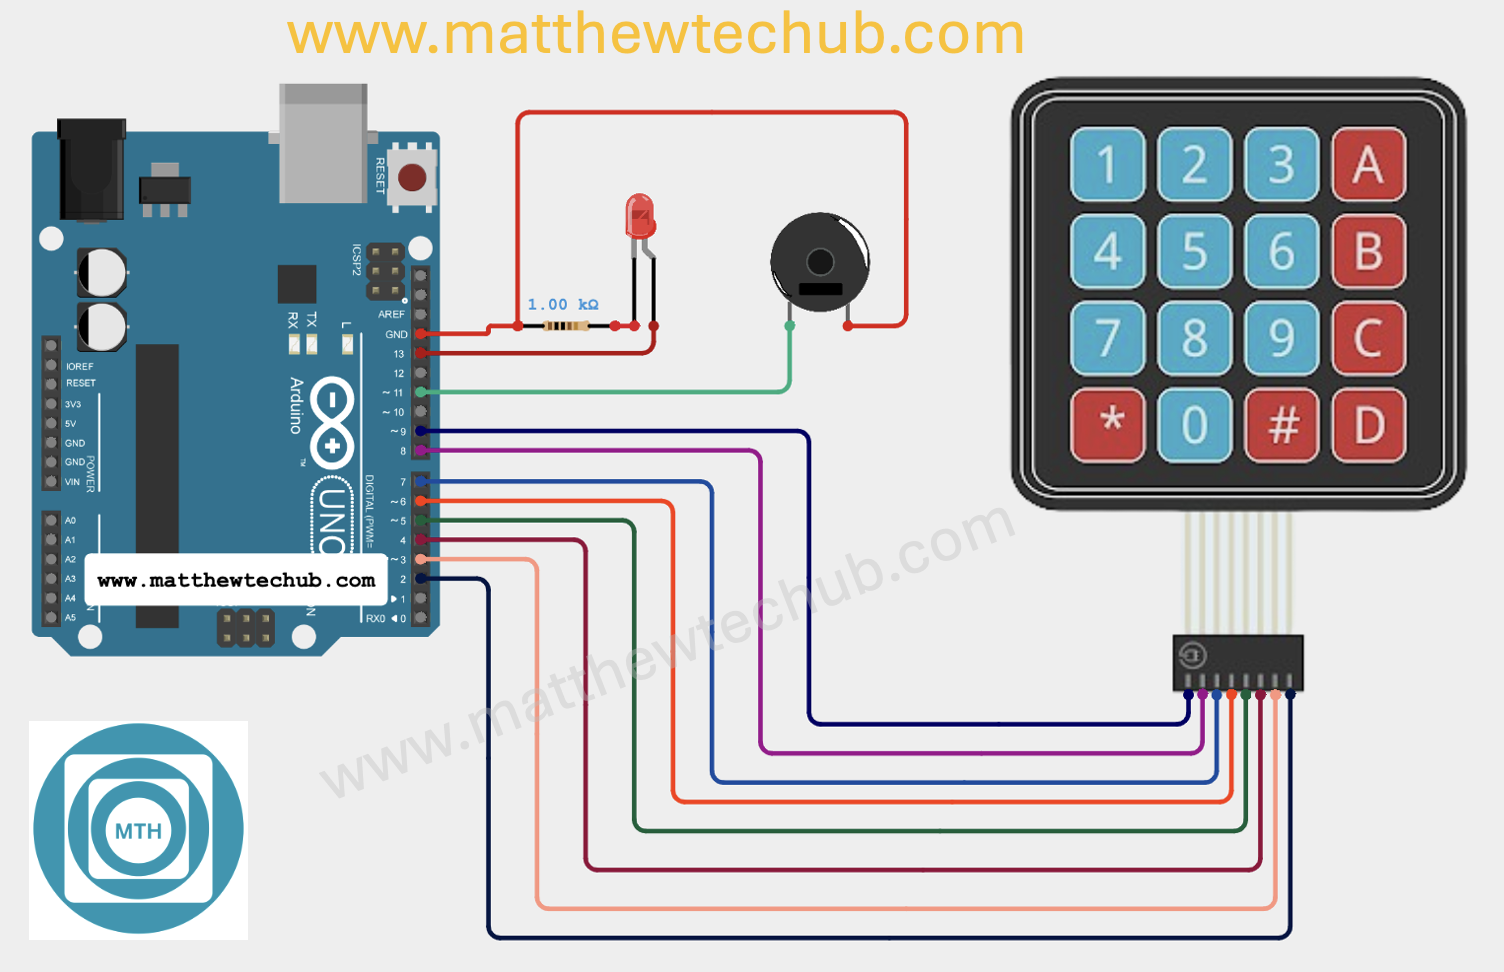
Circuit Wiring
Installation of Keypad Library
Before uploading the program to the Arduino board, we need to install the Keypad library and include the corresponding header file in the program. The screenshot below illustrates this process.
- Click on the Sketch menu at the top.
- Select Include Library from the dropdown menu.
- Click on Manage Libraries… at the top of the list. This will open the Library Manager.
- In the Library Manager window, there is a search bar in the upper right corner.
- Type Keypad in the search bar and press Enter.
- Look for the library named “Keypad by Mark Stanley, Alexander Brevig”.
- Click on the “Install” button next to the library. The installation process will start.
- Once installed, you will see “INSTALLED” next to the Keypad library.
Program Code
// www.matthewtechub.com
// keypad- password- led- buzzer
#include <Keypad.h>

// Define the number of rows and columns in the keypad
const byte ROWS = 4;
const byte COLS = 4;

// Define the symbols on the keys of the keypad
char keys[ROWS][COLS] = {
  {'1','2','3','A'},
  {'4','5','6','B'},
  {'7','8','9','C'},
  {'*','0','#','D'}
};

// Connect keypad ROW0, ROW1, ROW2, ROW3 to these Arduino pins
byte rowPins[ROWS] = {9, 8, 7, 6};
byte colPins[COLS] = {5, 4, 3, 2};

// Create the Keypad object
Keypad keypad = Keypad(makeKeymap(keys), rowPins, colPins, ROWS, COLS);

// Predefined password
String correctPassword = "2586";

// Variable to store the entered password
String enteredPassword = "";

// LED and Buzzer pins
const int ledPin = 13;
const int buzzerPin = 11;

void setup() {
  Serial.begin(9600); // Start serial communication
  pinMode(ledPin, OUTPUT); // Set the LED pin as output
  pinMode(buzzerPin, OUTPUT); // Set the buzzer pin as output
  Serial.println("Enter your password:"); // Prompt the user to enter the password
}

void loop() {
  char key = keypad.getKey(); // Get the key pressed

  if (key) { // If a key is pressed
    if (key == '*') { // If '*' is pressed, clear the entered password
      enteredPassword = "";
      Serial.println("Password cleared. Enter your password:");
    } else {
      enteredPassword += key; // Append the pressed key to the entered password
      Serial.print(key); // Display the pressed key

      if (enteredPassword.length() == 4) { // Check if the entered password length is 4
        if (enteredPassword == correctPassword) {
          Serial.println("\nCorrect password"); // Password matched
          digitalWrite(ledPin, HIGH); // Turn on the LED
        } else {
          Serial.println("\nIncorrect password"); // Password did not match
          for (int i = 0; i < 2; i++) { // Beep the buzzer twice
            digitalWrite(buzzerPin, HIGH);
            delay(200);
            digitalWrite(buzzerPin, LOW);
            delay(200);
          }
        }
        enteredPassword = ""; // Clear the entered password for the next attempt
        Serial.println("Enter your password:"); // Prompt for another attempt
      }
    }
  }
}
This code demonstrates how to use a keypad to input a password, verify it, and take actions based on the verification results—turning on an LED if the password is correct or beeping a buzzer twice if the password is incorrect.
Code Explanation
#include <Keypad.h>

const byte ROWS = 4;
const byte COLS = 4;

char keys[ROWS][COLS] = {
  {'1','2','3','A'},
  {'4','5','6','B'},
  {'7','8','9','C'},
  {'*','0','#','D'}
};

byte rowPins[ROWS] = {9, 8, 7, 6};
byte colPins[COLS] = {5, 4, 3, 2};

Keypad keypad = Keypad(makeKeymap(keys), rowPins, colPins, ROWS, COLS);
- The code initializes a 4×4 matrix keypad. Each button on the keypad is mapped to a specific character (`keys` array).
- The keypad is connected to specific Arduino pins (`rowPins` and `colPins`), allowing the code to detect which button is pressed.
String correctPassword = "2586";
String enteredPassword = "";

const int ledPin = 13;
const int buzzerPin = 11;- `correctPassword` is the predefined password that the user must enter.
- `enteredPassword` stores the keys pressed by the user.
- `ledPin` and `buzzerPin` are the Arduino pins to which the LED and buzzer are connected, respectively.
void setup() {
  Serial.begin(9600);
  pinMode(ledPin, OUTPUT);
  pinMode(buzzerPin, OUTPUT);
  Serial.println("Enter your password:");
}- Serial communication is initialized for displaying messages on the Serial Monitor.
- The LED and buzzer pins are configured as output.
- The user is prompted to enter a password via the Serial Monitor.
void loop() {
  char key = keypad.getKey();

  if (key) {
    if (key == '*') {
      enteredPassword = "";
      Serial.println("Password cleared. Enter your password:");
    } else {
      enteredPassword += key;
      Serial.print(key);

      if (enteredPassword.length() == 4) {
        if (enteredPassword == correctPassword) {
          Serial.println("\nCorrect password");
          digitalWrite(ledPin, HIGH);
        } else {
          Serial.println("\nIncorrect password");
          for (int i = 0; i < 2; i++) {
            digitalWrite(buzzerPin, HIGH);
            delay(200);
            digitalWrite(buzzerPin, LOW);
            delay(200);
          }
        }
        enteredPassword = "";
        Serial.println("Enter your password:");
      }
    }
}Key Detection:
- The program continuously checks if a key is pressed on the keypad.
- If the `’*’` key is pressed, it clears the entered password and prompts the user to start over.
- Any other key pressed is added to the `entered Password`, and its value is printed on the Serial Monitor.
Password Verification:
- Once four keys are pressed, the program checks if the entered password matches the correct password:
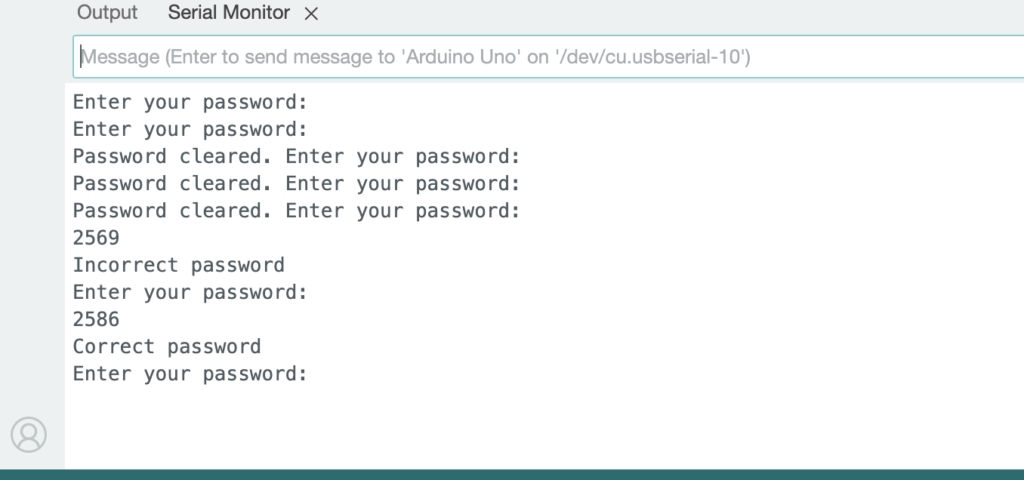
- Correct Password: If the entered password matches the correct password (`2586`), the program prints “Correct password” on the Serial Monitor and turns on the LED by setting the `ledPin` to `HIGH`.
- Incorrect Password: If the entered password does not match, the program prints “Incorrect password” and beeps the buzzer twice by turning it on and off with a short delay in between each beep.
- After checking the password, the program clears the `entered Password` for the next attempt and prompts the user to enter the password again.
Screenshot

console.log("Hello World");
