About The Project
In this project we will study how to interface a joystick with Arduino Uno Board.
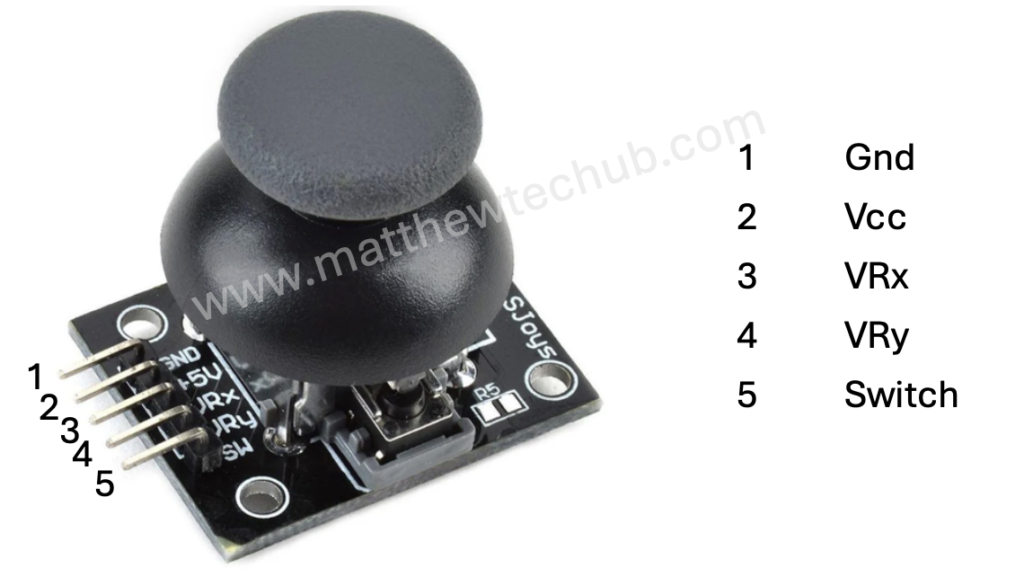
Joystick
A joystick is an input device commonly used to control video games and robotic systems. It consists of a handle that pivots on two axes (X and Y) and often includes a button switch.
Servo Motor
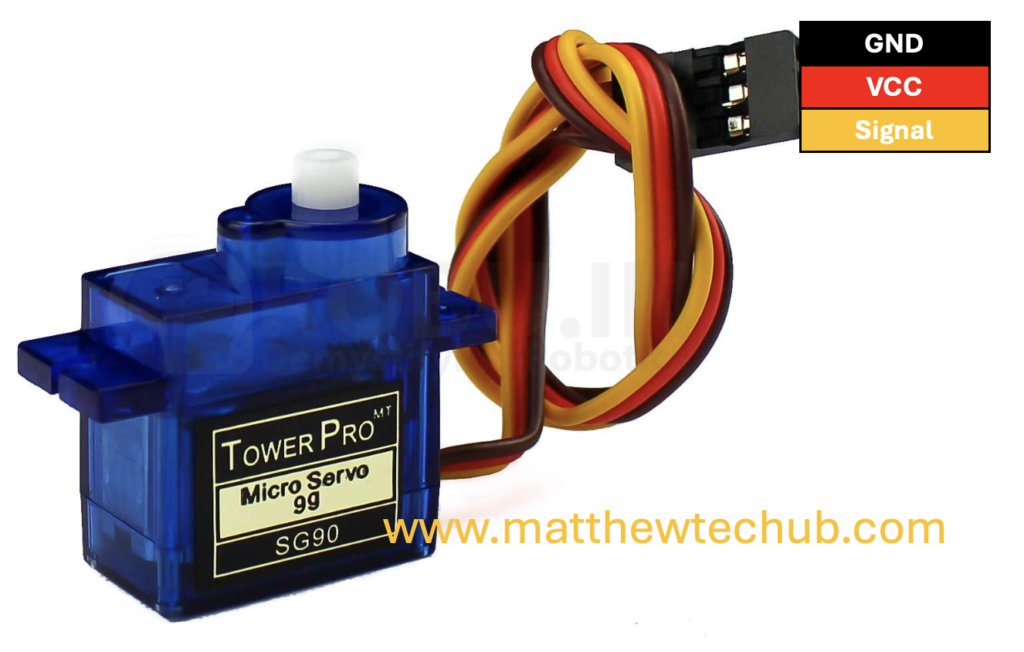
A servo motor is a type of motor where precise control of angular position is required.
- A servo motor receives a PWM (Pulse Width Modulation) signal on its control wire.
- The width of the pulse determines the position of the servo horn (output shaft).
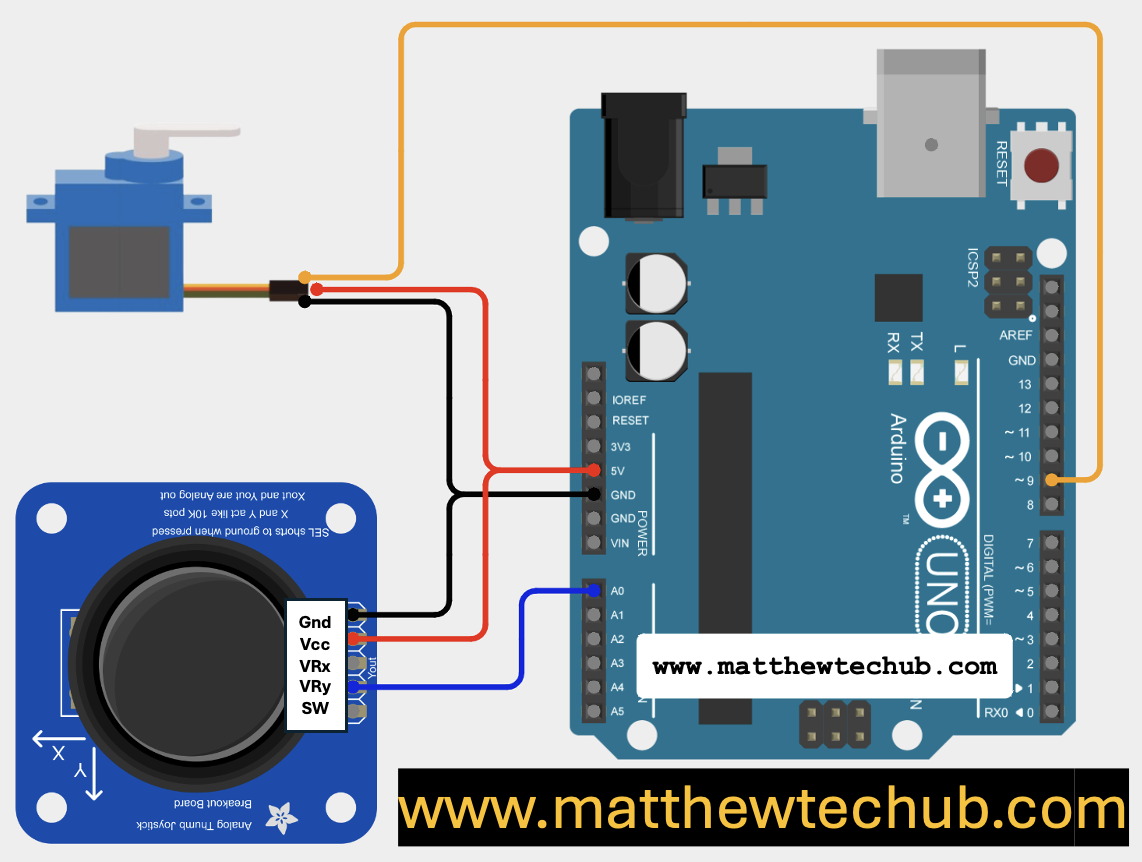
Circuit Wiring
Program Code
// www.matthewtechub.com
// Servo motor control using Y-axis of a joystick

#include <Servo.h>

Servo myServo;  // Create a Servo object to control the servo motor

int joystickPin = A0;  // Define the analog pin where the Y-axis of the joystick is connected
int joystickValue;     // Variable to store the value read from the joystick
int angle;             // Variable to store the angle for the servo motor

void setup() {
  myServo.attach(9);  // Attach the servo to digital pin 9
  Serial.begin(9600); // Initialize serial communication for debugging
}

void loop() {
  joystickValue = analogRead(joystickPin);           // Read the analog value from the joystick (0 to 1023)
  angle = map(joystickValue, 0, 1023, 0, 180);       // Map the joystick value to an angle (0 to 180 degrees)

  myServo.write(angle);  // Set the servo position to the mapped angle
  Serial.print("Joystick Value: ");  // Print the joystick value for debugging
  Serial.print(joystickValue);
  Serial.print("  -  Servo Angle: ");  // Print the servo angle for debugging
  Serial.println(angle);

  delay(15);  // Short delay to stabilize the reading and servo position
}
This program interfaces a joystick with an Arduino board to control a servo motor using the Y-axis of the joystick. The main goal is to explore the differences between using a regular potentiometer and a joystick’s variable resistor for controlling a servo motor, especially at the circuit and programming levels. In this setup, the neutral (center) position of the joystick corresponds to the servo motor being at 90 degrees, instead of 0 degrees.
Code Explanation
#include <Servo.h>- The `Servo.h` library is included, which allows the Arduino to control the servo motor. The `Servo` object `myServo` is created to interact with the servo motor.
int joystickPin = A0;  // Define the analog pin where the Y-axis of the joystick is connected
int joystickValue;     // Variable to store the value read from the joystick
int angle;             // Variable to store the angle for the servo motor
- `joystickPin` is defined as `A0`, indicating that the Y-axis of the joystick is connected to the analog pin A0 of the Arduino.
- `joystickValue` will store the value read from the joystick, which ranges from 0 to 1023.
- `angle` will store the angle that the servo motor should move to, based on the joystick’s position.
void setup() {
  myServo.attach(9);  // Attach the servo to digital pin 9
  Serial.begin(9600); // Initialize serial communication for debugging
}
- In the `setup()` function, the servo motor is attached to digital pin 9 using `myServo.attach(9);`.
- `Serial.begin(9600);` initializes the serial communication at a baud rate of 9600 for debugging purposes.
void loop() {
  joystickValue = analogRead(joystickPin);           // Read the analog value from the joystick (0 to 1023)
  angle = map(joystickValue, 0, 1023, 0, 180);       // Map the joystick value to an angle (0 to 180 degrees)

  myServo.write(angle);  // Set the servo position to the mapped angle
  Serial.print("Joystick Value: ");  // Print the joystick value for debugging
  Serial.print(joystickValue);
  Serial.print("  -  Servo Angle: ");  // Print the servo angle for debugging
  Serial.println(angle);

  delay(15);  // Short delay to stabilize the reading and servo position
}
- `analogRead(joystickPin);` reads the analog value from the joystick’s Y-axis, which ranges from 0 to 1023.
- `map(joystickValue, 0, 1023, 0, 180);` maps the joystick’s analog value to an angle between 0 and 180 degrees. This conversion is necessary because the servo motor’s position is controlled by angles within this range.
- `myServo.write(angle);` sends the calculated angle to the servo motor, moving it to the corresponding position.
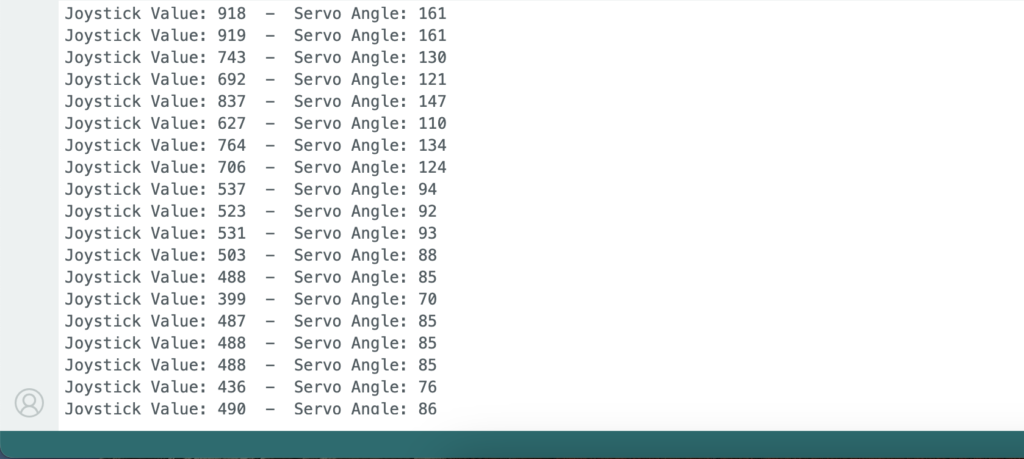
- `Serial.print` and `Serial.println` commands are used to print the joystick’s value and the corresponding servo angle to the Serial Monitor for debugging.
- A short delay of 15 milliseconds stabilises the reading and the servo motor’s movement.
Relevance to the Project
- Joystick vs. Potentiometer: Unlike a regular potentiometer, the joystick has a neutral (center) position. When the joystick is centered, it outputs a value around 512 (which maps to 90 degrees), meaning the servo motor stays at 90 degrees, its neutral position. A potentiometer, on the other hand, typically starts at 0 degrees, unless manually adjusted.
- Control Precision: The joystick allows for more precise control in both directions (above and below 90 degrees), making it ideal for applications like controlling a camera gimbal or steering in an electric car. The neutral position of the joystick ensures that the servo returns to a central position when no input is given.
- Clockwise and Counterclockwise Movement: When the joystick is moved upwards, the servo motor’s shaft rotates clockwise from its resting position of 90 degrees. Similarly, when the joystick is moved downwards, the servo motor rotates counterclockwise from the resting position of 90 degrees. This behaviour mimics the natural steering movements in applications like a car’s steering system, where the central position is neutral, and the steering wheel moves in either direction based on the joystick’s input.
Screenshot
Try Yourself
Modify the program and circuit to control the servo motor using the ‘X’ axis control pin of the joystick.
